Moody TV Room and DIY LED Slat Wall Tutorial
When it came to designing our upstairs TV room, I was always drawn to dark and moody vibes. We wanted a cozy space where our family could enjoy countless Harry Potter marathons. My husband Taylor is a big tech guy so I tried to find a way to incorporate elements he loved into the design. Our biggest challenge by far was the wall with the 65″ TV on it. We went back and forth on what to do and finally decided to install vertical slats on either side of the TV with built-in LED strips for mood lighting. I’m detailing the whole process here! So keep reading for all you need to know about our moody TV room and DIY LED slat wall tutorial!
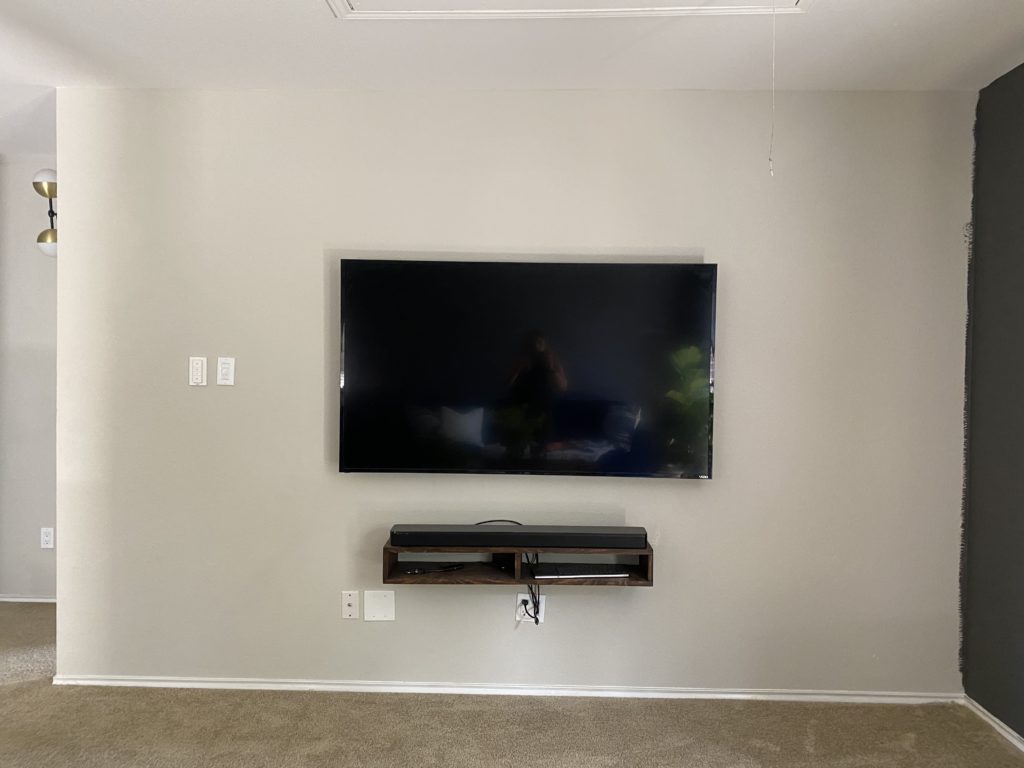
Here’s a view of the TV wall before we made any changes:
We started by painting the wall “Shades on” by Behr and removing the baseboards.
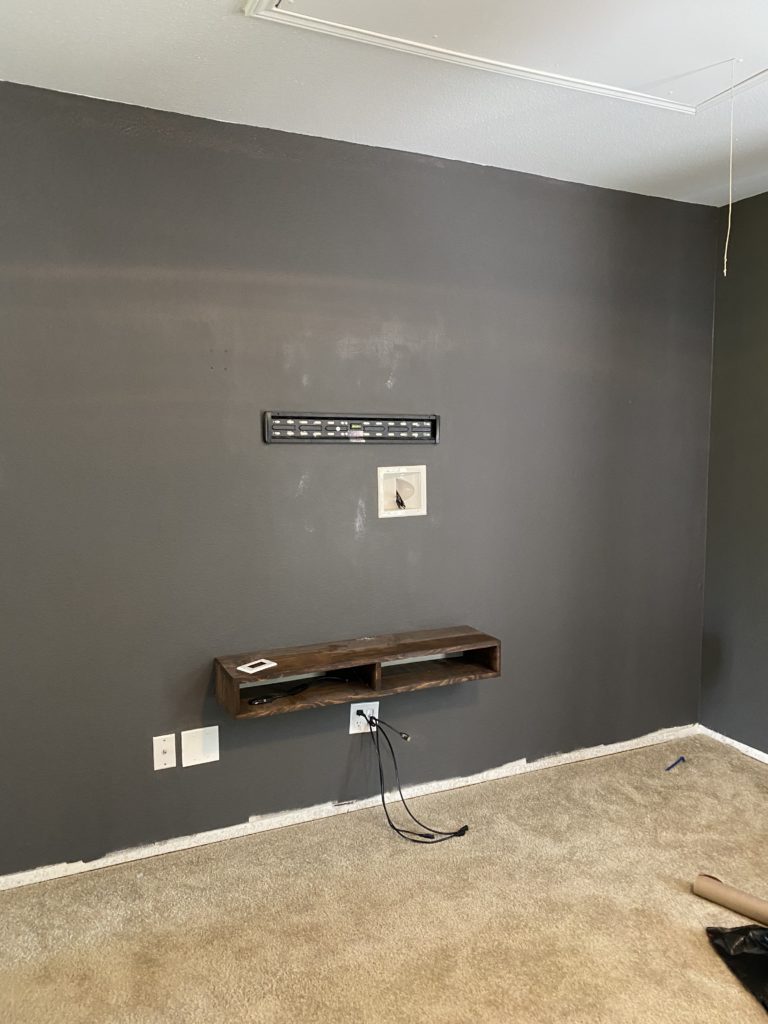
After painting the wall, it was time to get to work on the slats! We followed the same general plan we used for the vertical slat wall in our bedroom but with a few modifications. Rather than one large section, we decided on two 30.75″ sections on either side of the TV.
Materials Needed:
- (30) 1x2x8 pre-primed mdf boards
- (2) 1x4x8 pre primed mdf boards
- (1) Phillips Hue LED Strip
- (1) Phillips Hue 6-pin-to-cut-end connect
- (1) Phillips hue Extension Cable
- 1 ¼” nails
- wood filler
- paint
Tools Needed:
- Router and 5/8″ bit
- Nail gun
- Laser Level (not necessary but highly recommended)
- Miter Saw (or you could have the boards cut at your hardware store)
Instructions:
First, you’ll need to make your cuts. I’ll insert a visual below with all of the measurements so it’s easier to understand. Note: Our measurements are based off of our 8ft. ceilings. If you have different height ceilings, adjust accordingly.
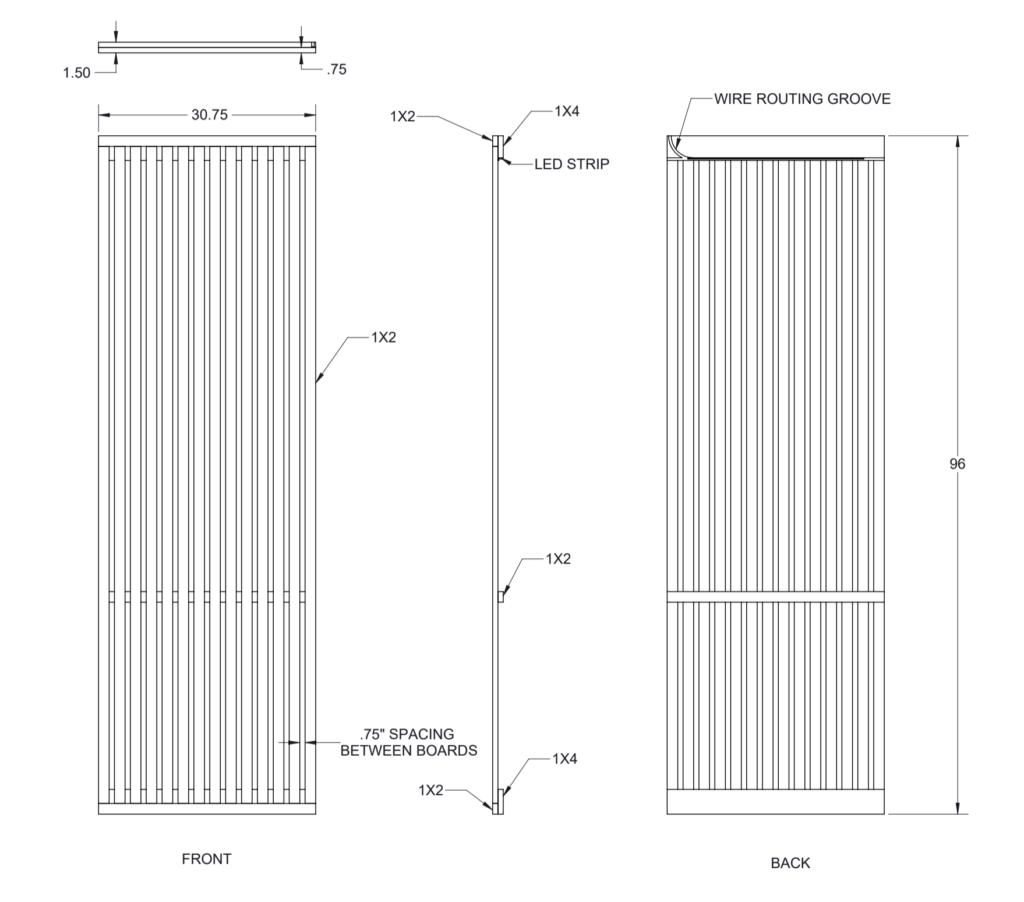

Total Measurements (for 2 slat walls):
- (6) 30.75″ 1x2s
- (4) 30.75″ 1x4s
- (28) 93″ 1x2s
Once you’ve made all of your cuts, go ahead and paint the boards. This will be much easier than painting after installation! Tip: Paint the front and sides, but don’t bother painting the back of the boards, those wont be visible.
LED Strip Prep:
You’ll be inserting your light strips into the top 1×4 pieces. To hide the LED strips, we routed grooves into the 1x4s and glued the strips into the grooves.
Set the height of the router to roughly ⅜” and route a groove in the bottom of the back side of the board (using a 5/8″ router bit). TIP: You can use your router to create a channel to route the power cable for the LED strip through the board and up into the ceiling.

Once you’ve routed your grooves, your two top 1×4 pieces should look like this:

We chose Philips hue lighting strips because they are compatible with Apple Homekit, our smart home platform of choice. The strip comes in an 80” length with markings every 25” where it can be cut to a shorter length. Rather than purchasing two separate lighting kits, we cut our strip into two pieces and used some cat6 cable to reconnect the two separate pieces by soldering. We have since found out that you can buy Philips Hue Lightstrip Connectors and extension cables that would have saved us a lot of headache. We recommend buying these additional pieces to save you the soldering work.
To begin the installation, fasten the LED strips into the routed 1×4 pieces using the pre-applied adhesive backing. Connect the extension cable to the first lighting strip and locate where the power cord needs to be fed into the attic. Note: The Philips Hue Strips use Low Voltage, so they can safely be run inside of walls or attics.
Mark where you want your slat wall installed and drill two holes in the ceiling (one for the light strip’s power input cable and the other for the extension cable). Feed the extra cord into the attic and secure the top 1×4 into place using nails (being careful not to puncture the lighting strip or either of the cables).
Once your top pieces are in place and your cords are fed into the attic, you can continue with the installation of the slat walls.
Slat Wall Installation
After you’ve nailed your top 1x4s into place, nail in your remaining horizontal support pieces (30.75″ 1×2 and bottom 1×4). Tip: We used a laser level to make sure these pieces all lined up perfectly.
Now that all the horizontal pieces are in, nail another 1×2 horizontal piece flush with the ceiling. Line your first vertical piece to the top 1×2 and nail it in at the three horizontal supports (top, middle and bottom). Take a scrap 1×2 and use the 3/4″ side as a spacer.
Continue to nail in your vertical pieces until they’re all installed! To finish it off, fill the nail holes with wood putty and paint over them once the putty is dry.
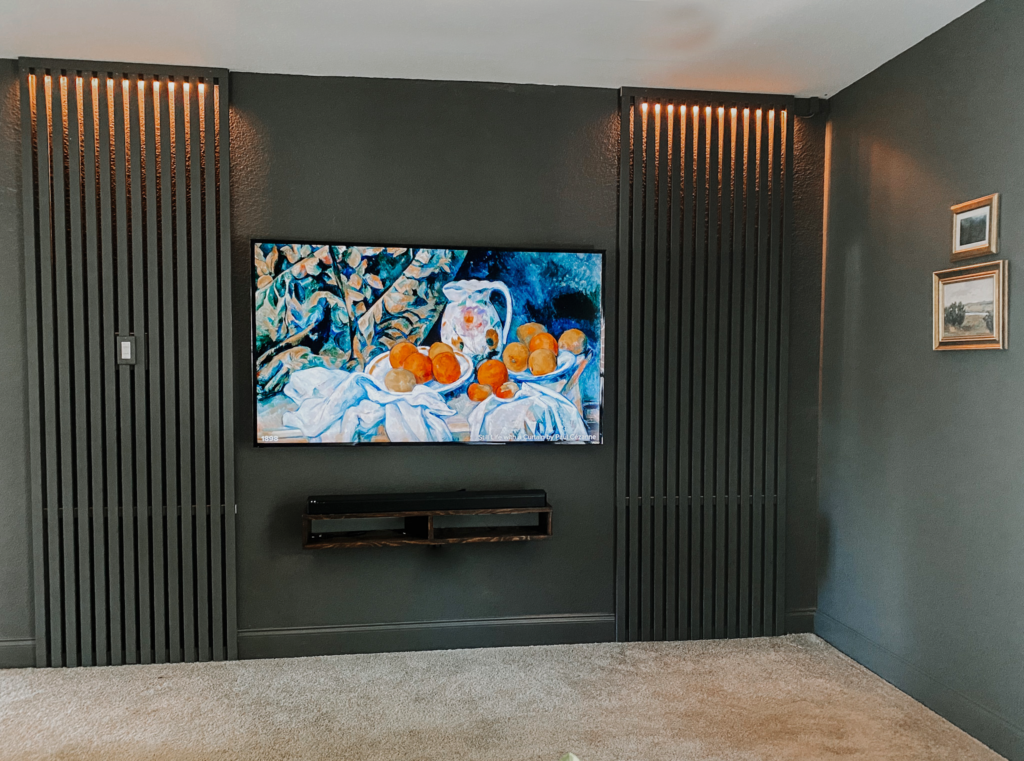
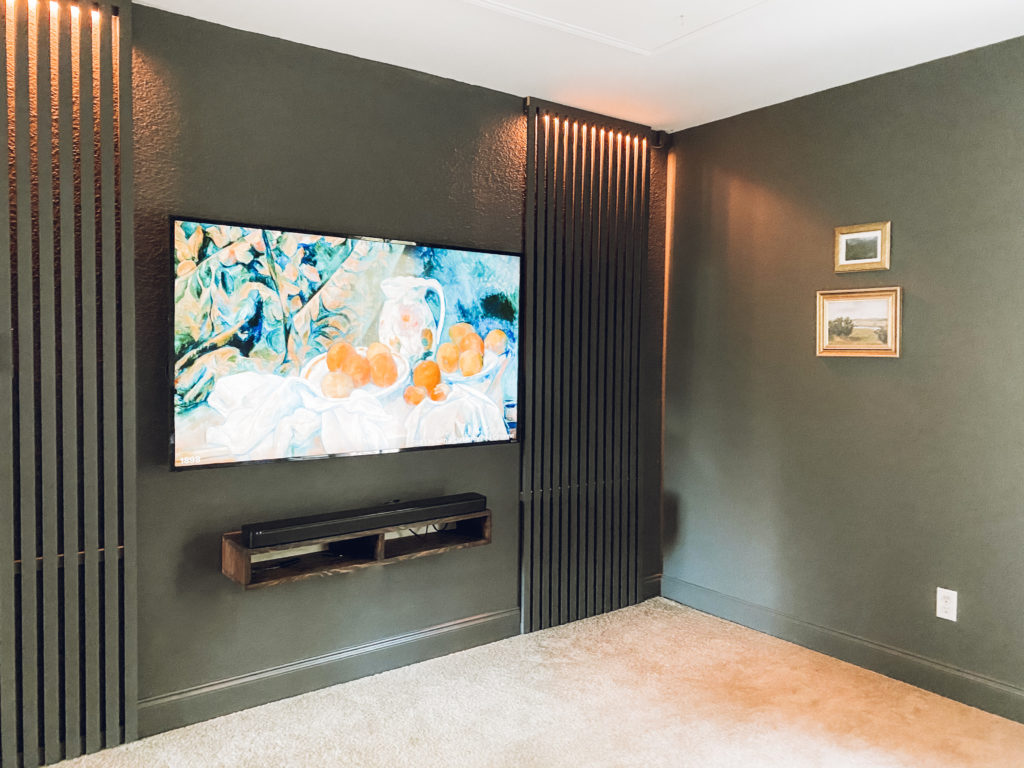
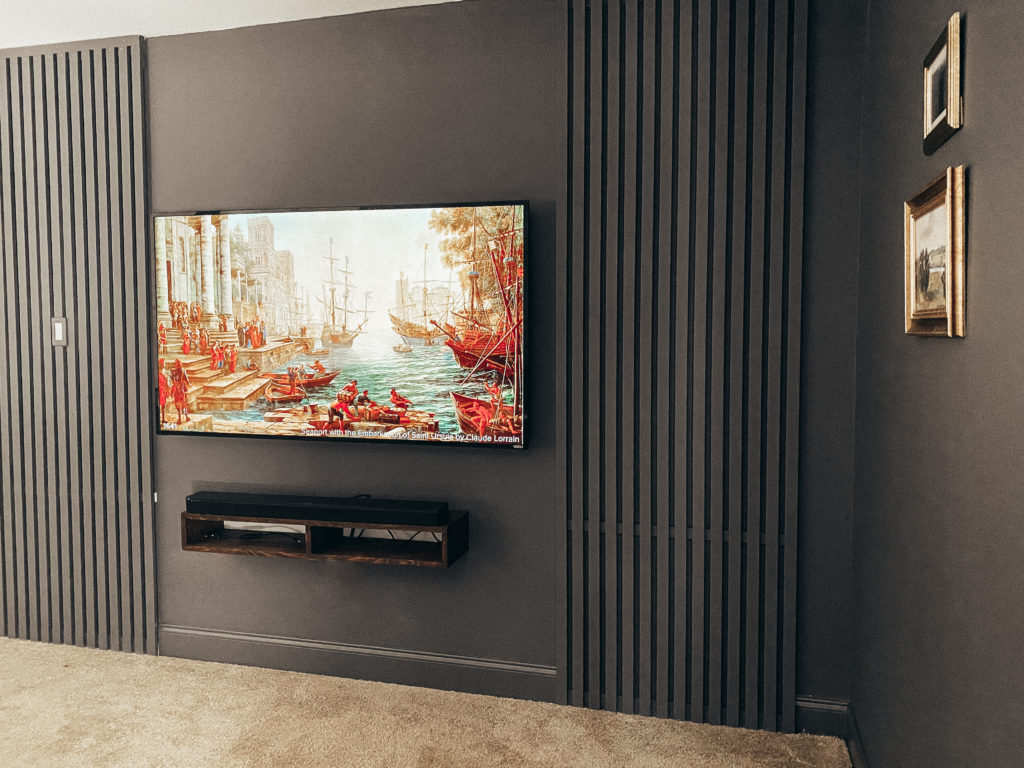
Here’s our finished moody TV room and DIY LED slat wall:
Disclaimer: this post may contain affiliate links, meaning I get a commission if you decide to make a purchase through my links, at no cost to you.

Add a comment
0 Comments