Bedroom Refresh (Part 2) DIY Vertical Wood Slat Wall
A few weeks back I set out on a mission to refresh our bedroom. I came up with a design plan, started installing frame moulding (see Part 1), and now we’ve built a DIY vertical wood slat wall that functions as a headboard! Here’s how we did it.
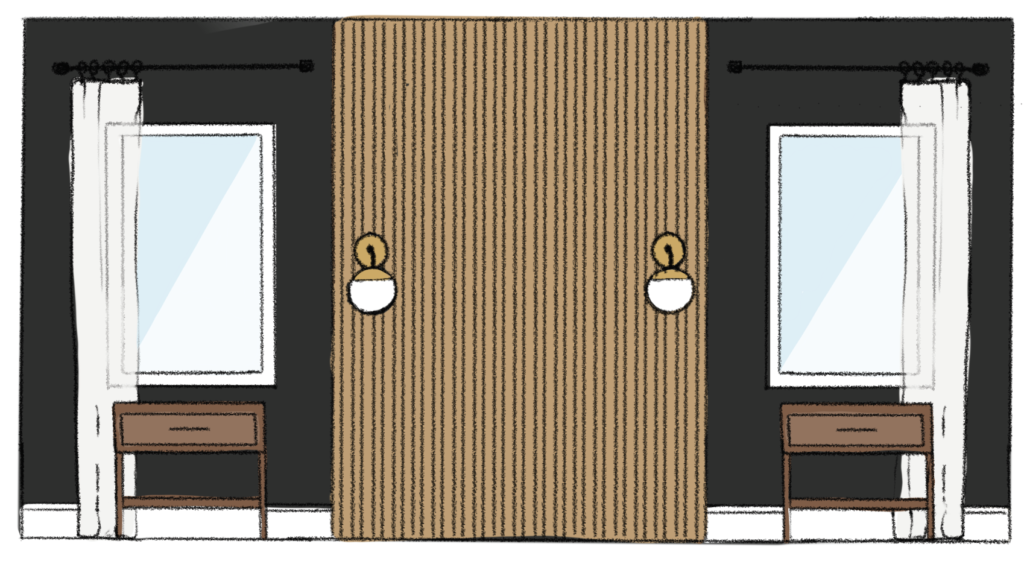
We started with a plan–that’s the first step in every project, right?
We measured the space (64″) and decided to use 1 x 2 x 8 select pine boards with the 2″ side flat to the wall. Honestly, I preferred the look of using thinner boards but that would increase the overall cost significantly. So, we opted for the more affordable route.
Our shopping list:
- (32) 1 x 2 x 8 Select Pine Boards
- Varathane “Early American” stain
- (3) 1 x 4 pre-primed MDF boards
We have 8′ ceilings in the bedroom and chose to cut each of the 1 x 2 boards down to 92.5″ (This left enough room for horizontal pieces on top and bottom). Once they were cut to size, I stained the boards with “Early American” stain.
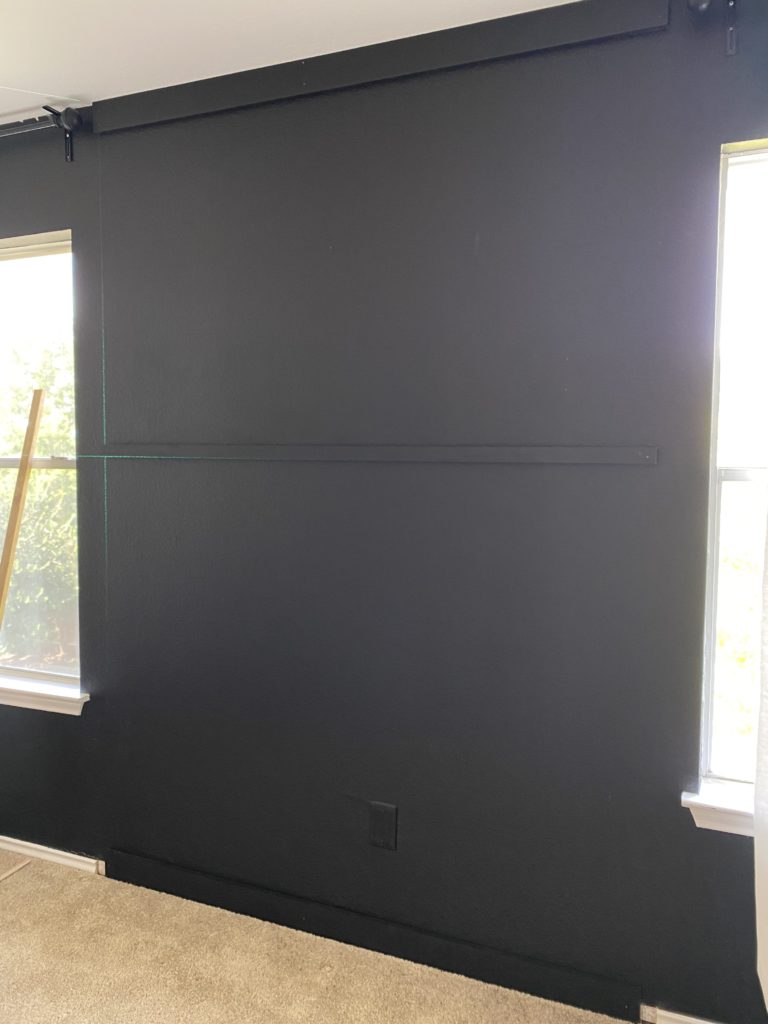
We installed three 1×4 pieces (cut 64″ long) into studs horizontally on the top, middle and bottom of the wall. This allows us to nail the vertical boards into those pieces rather than directly into the wall. This isn’t necessary but gives us the option to remove the vertical slats in the future with minimal damage to the drywall.
Note: We used an oscillating multi-tool to remove a portion of the baseboard so we could install the slats all the way to the floor.
Once the horizontal pieces were installed, we nailed a 1 x 2 flush with the ceiling. This served as a “frame” of sorts for the vertical boards and helped us install the boards as straight as possible.
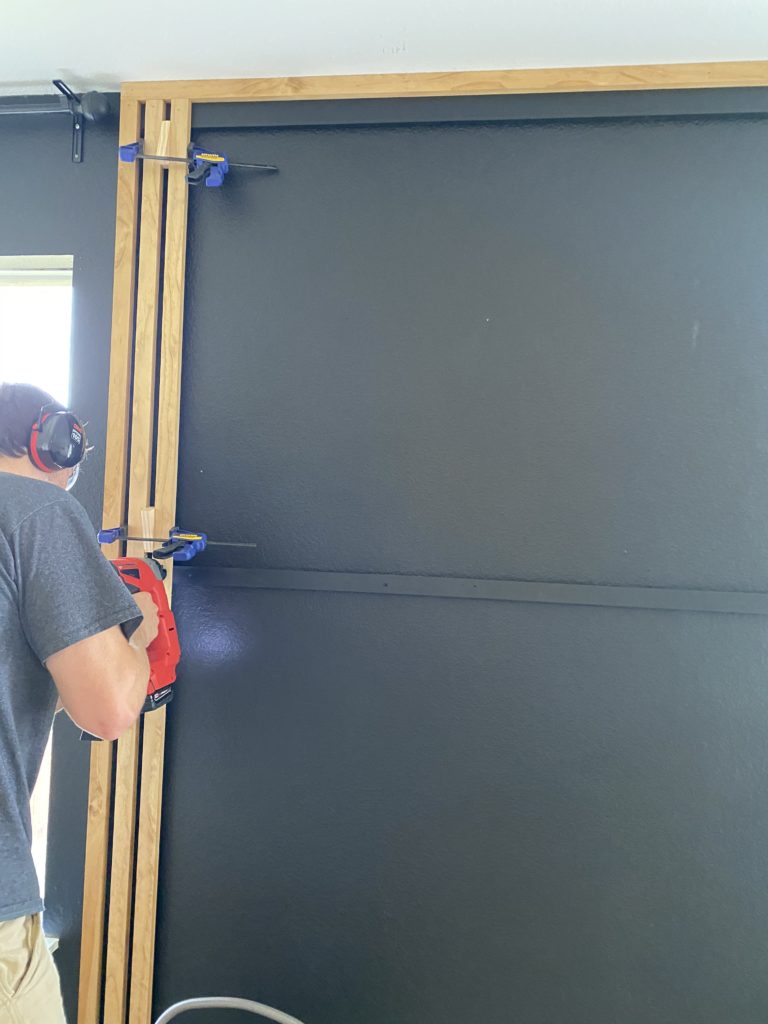
Then we started installing the vertical boards! We used a 1×2 piece as a spacer and clamped the vertical boards together before nailing them in.
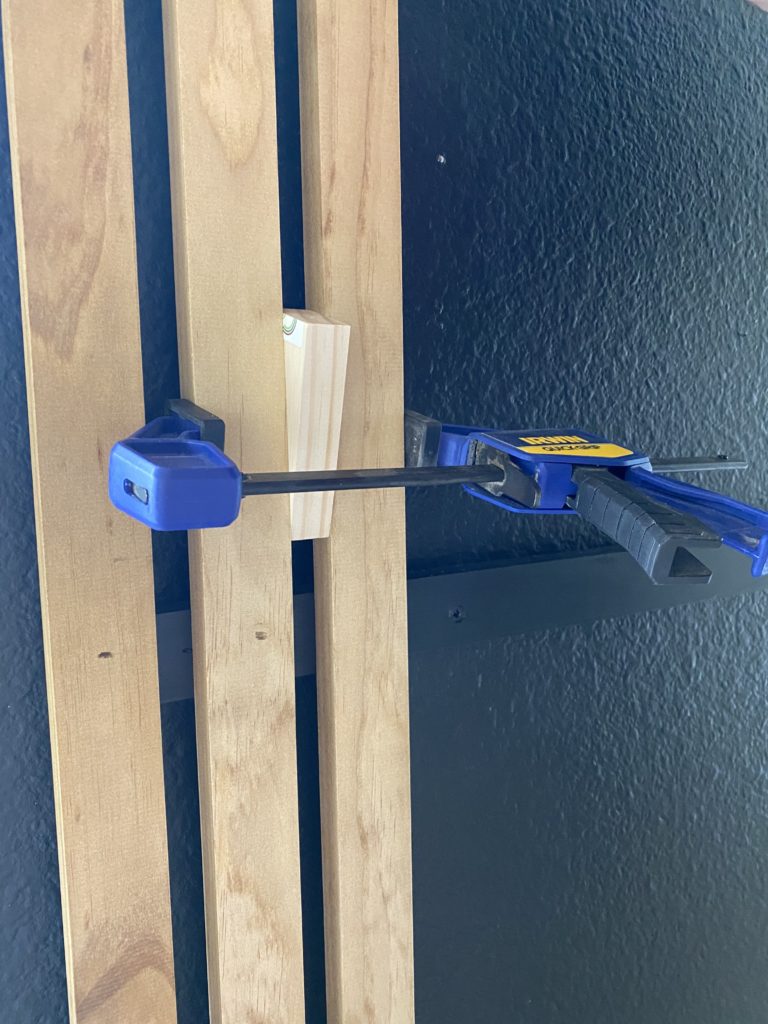
We continued this process and installed the remaining vertical boards.
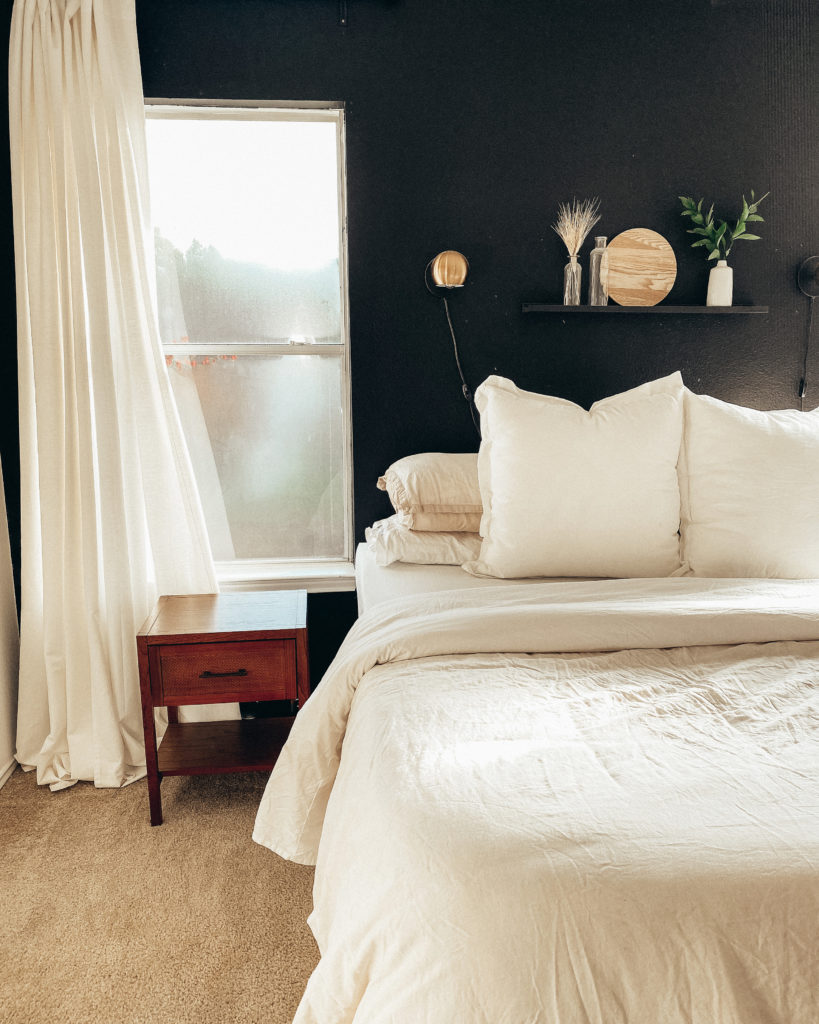
Here’s a view of the space before the DIY vertical wood slat wall:
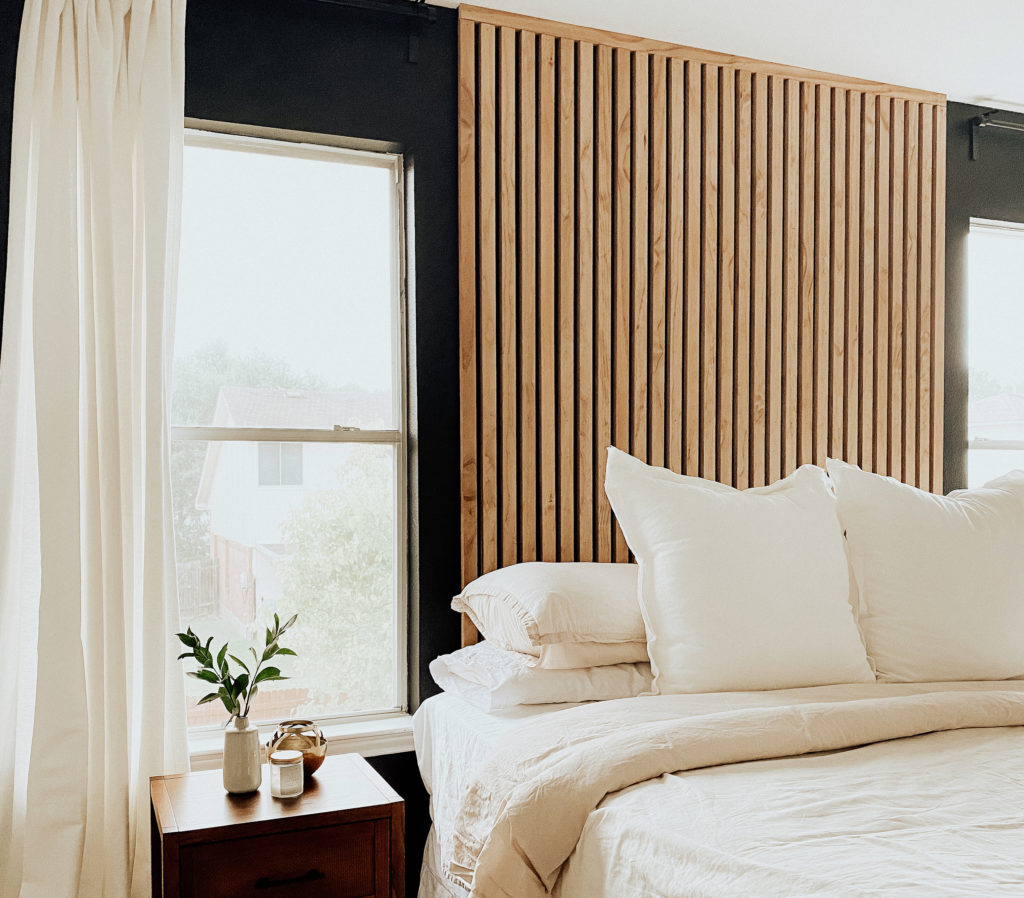
And here’s how it looks now!

I’m so happy with how the space is coming together! Stay tuned for Part 3 of the refresh when we tackle more DIYs and really tie everything together. As always, thanks for keeping up with the Campbell House. We’re so happy to have you!
Disclaimer: this post may contain affiliate links, meaning I get a commission if you decide to make a purchase through my links, at no cost to you.

[…] tutorials on Pinterest with all different methods & ended up basing what I did off of this blog post from Campbell House, with a few […]
[…] wall, it was time to get to work on the slats! We followed the same general plan we used for the vertical slat wall in our bedroom but with a few modifications. Rather than one large section, we decided on two 30.75″ […]
[…] If you’re interested in recreating my Vertical Slat Headboard, you can find those details here! […]
Hi there! Love how it came out! What color and finish black paint did you use for your headboard wall?
So glad you love it! The black wall is painted “Limousine Leather” by Behr in an Eggshell finish!
Thank you so much for this tutorial, This is exactly what i want for my entry area with bench.. Yours came out outstanding.. I love everything about it. Genius idea of attaching slats to board instead of wall. saves Holes.
That means so much, thank you Bev!
Hello. I love this headboard project! I’m doing this! I love the idea of the horizontal boards, so I don’t put all of those nails into my drywall. Anyways, just wondering what this project cost you?
Yay! So glad to hear you’re giving it a try! I believe the project cost around $150. Unfortunately, the price of lumber has gone up quite a bit since I did this project. I think you could still achieve this look for under $200 though!
[…] pinning ideas for our guest room refresh, I ran across this wall treatment idea. Always on a budget, I was on the lookout for simple, yet high impact ideas that wouldn’t […]
[…] Credit: Campbell Home & […]
You’re amazing! I love this look so much and you are one ambitious DIYer! One question, though: do the slats have any disadvantages such as difficult to clean, hideaway for spiders, etc? I always loved blonde wood slat screens but wondered if there was a dark side? Thanks and thanks so much for sharing your knowledge and hard work!
You’re so kind, thank you! So far I haven’t even noticed any dust collecting there which is surprising since it’s been there so long. Definitely no spiders yet either haha but now I will be looking for them!
Love this! Is this a king or queen bed?
Thanks! This is a king bed
I came looking for a tutorial for this project and am happy to have found yours. It was fun to read your paint color in the comments, as I have Limousine Leather on several walls in my own home! I plan to install a strip of dimmable LED lights down low behind my slats, to have the light glow up and through them. Thanks for sharing your process; it turned out beautifully!
Is there a gap between the slat wall and the old wall? Is it noticeable since u used 1×4 instead of nailing directly to the wall
There is a gap but I actually prefer it, I didn’t want the slats to sit directly on the wall, this feels a little more high-end than just nailing boards to the wall (in my opinion). We painted the boards the same color as the wall so you really don’t see or notice them at all!
Your wall is beautiful! Thank you for the step by step directions. I hope to do this on my dinning room wall. Question… did you have any electrical outlets behind the slates? I will have a couple of them and wondering how to work around them. Make a break in the slats around the outlet? Move the outlet farther out? Any advice? Thank you 🙂
Hi Melissa! That’s so exciting that you’ll be taking this project on! We had one and we actually bumped the outlet out with the same wood we used for the slats (kind of like a little box) and installed the outlet on top of the slats. I hope that’s helpful! I think making a break in the slats and continuing around the outlet is a great option also.
Beautiful wall that I am looking forward to creating in our new home build. Are there no outlets on this wall that would be of concern? Just trying to figure out this obstacle.
Hi Karla! We didn’t run into any outlets but if you do, you could purchase an outlet spacer to bump it off of the wall a bit and screw the plate on top of the slats. You could also cut the slats to go around the outlet. Hope that helps!
Do you think I can use a brad nailer for this project?
Absolutely!
Looks great, what size nails did you use in your nailer?
We have a 15 gauge nail gun!
We have a 15 gauge nail gun and it worked great! I believe we used 1.5″ nails.
Hello,
I love your wall. I want to do this in my bedroom. It looks fairly straight forward but one question. My walls are 8ft x 14.46ft.
How do I figure out how much slats I need for .75 space.
Thank you
Nancy