DIY Faux Bed Frame Cover
When inspiration strikes and the project costs a total of $75, you go with it. That’s exactly what happened a few weeks ago when I realized I didn’t like the look of my bedskirt but wasn’t ready to go all-in on an expensive bed frame. I realized I could easily build a cover for my existing metal frame that would give the look of a nice bed for a whole lot less! Here’s how I achieved that look by building a DIY faux bed frame (cover).
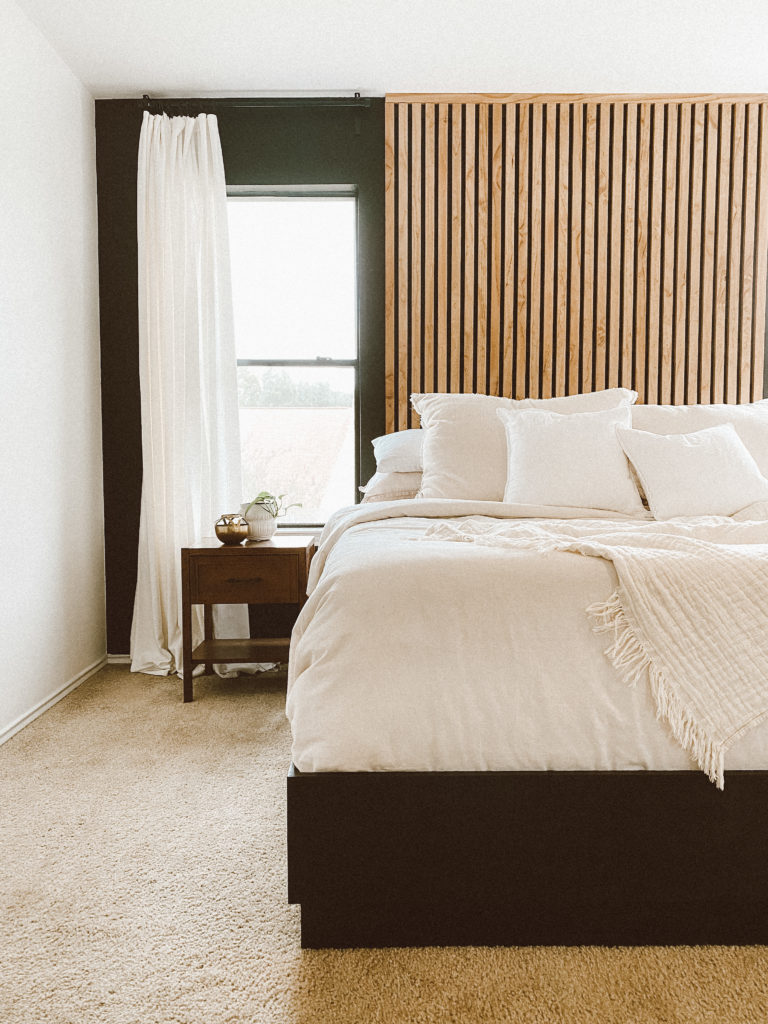
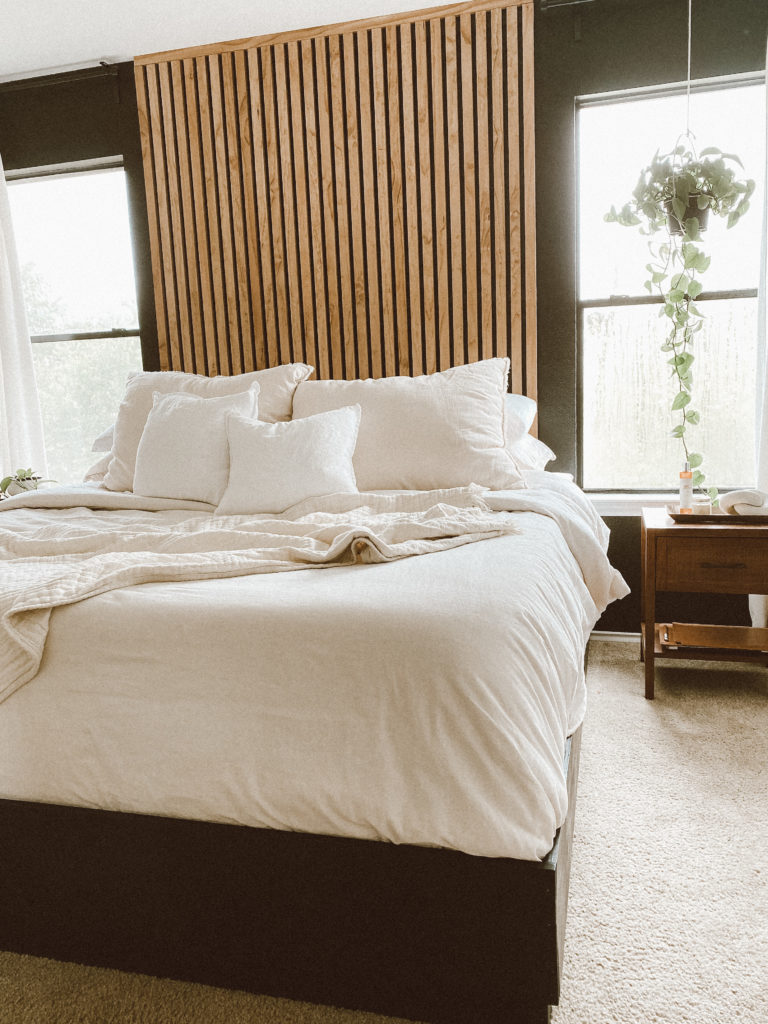
For reference, this (pictured below) is my bed with a simple bedskirt covering the boxspring/frame. I’m currently in the process of renovating my bedroom (so please don’t just the current state!) and you can find my design plans here.
I designed this cover to slide into place around my existing bed frame. The concept is simple–build a three-sided box that will slide over the bed frame, giving the illusion that the bed is supported by a wooden frame.

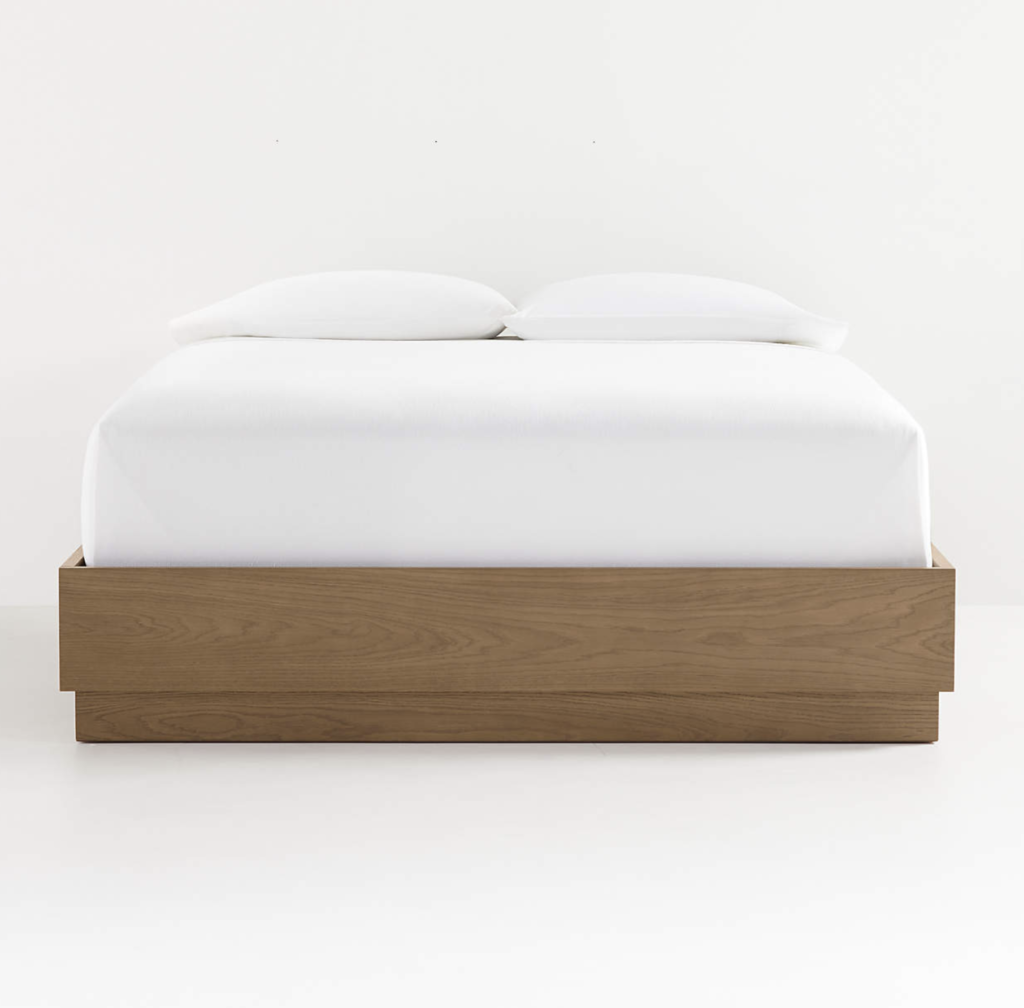
I did a quick google search and found this box-style bed ($699 USD) from Crate & Barrel that I used as my inspiration.
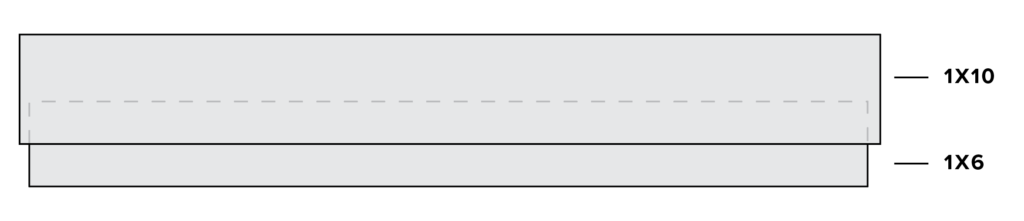
Based on the height of my bed frame (13″), I decided to use 1x10s for the top panels and 1x6s for the bottom panels. The 1x6s will be nailed inside the 1x10s like this–
Materials:
- (3) 1x10x8 Common Board
- (3) 1x6x8 Common Board
- (4) Corner Braces (optional- for additional support)
- (optional) Mitre Saw
- Stain or paint color of choice
Step One: Measure and Cut
Once you have your materials, measure the front of your bed frame. Take that number, add .5″ for padding, then add an additional 1.5″ to accommodate for the width of the two side boards (.75″ each). I know this is confusing to read, so here is a little graphic. Keep in mind that I’m using my king bed frame measurements and yours could be different.
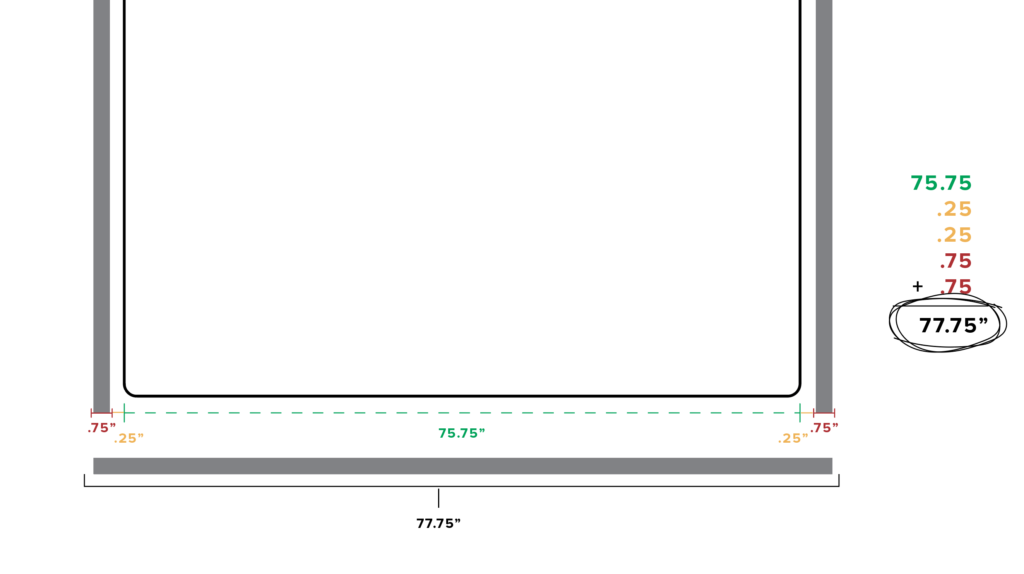
Use the measurement (77.75″) for your front 1×6 panel and cut it to size. For your side panels, measure the side of your bed frame and add as much length as you want. I chose to cut my side (1×6) panels to 79.5″.
Now that you have your 1x6s cut to size, it’s time to measure for your 1×10 cuts.
For your front panel, take your first front measurement (77.75″) and add another 1.5″ to accommodate for the width of the side panels. I cut my front 1×10 piece to 79.25″.
For the sides, use the same measurements as the 1x6s (79.5) and add .75″ so they can fit around the width of the 1×6 front piece.
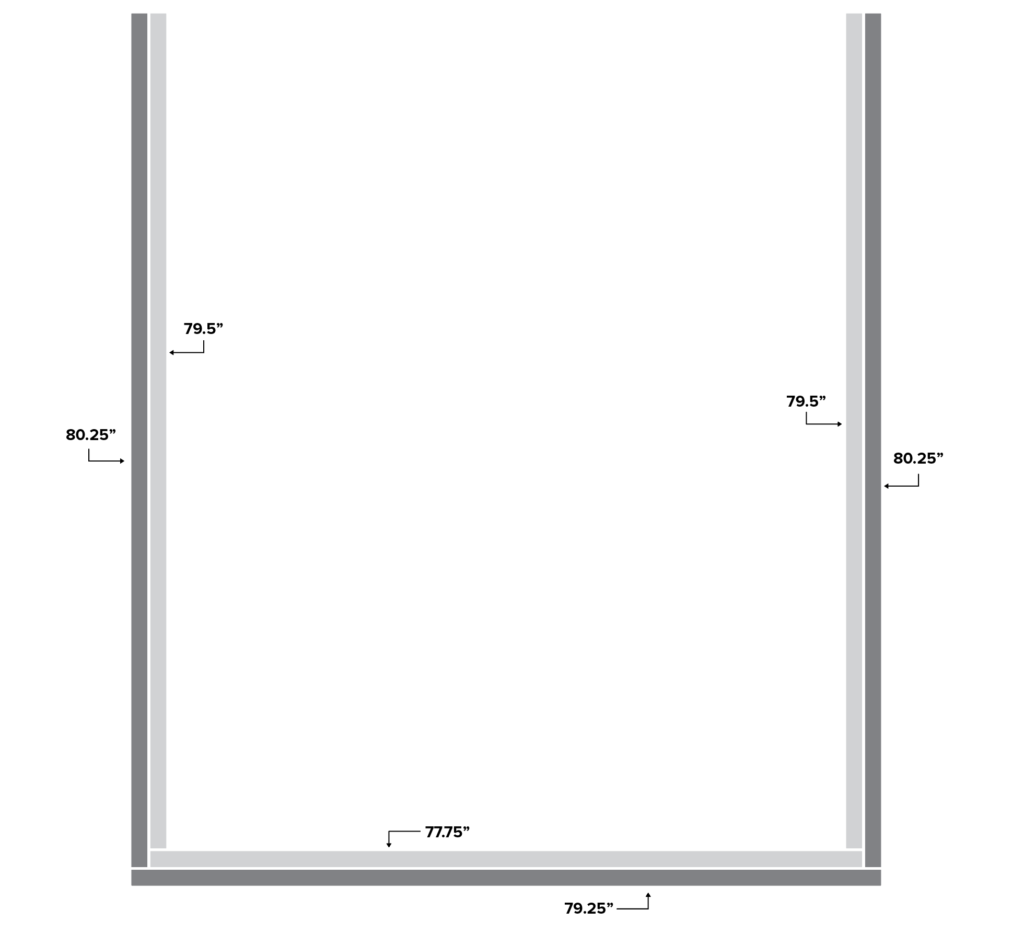
My Final Measurements:
1 x 6 – (1) 77.75″, (2) 79.5″
1 x 10 – (1) 79.25″, (2) 80.25″
I promise that is the most complicated part of this whole process! The math is a bit confusing to explain in written form.
Step Two: Paint/Stain Your Boards
I initially made the mistake of nailing my frame together before I had sanded and stained my boards. However, the size of the frame was so big, I couldn’t get it through any doors *face palm*. I then had to disassemble it for the next steps. So do as I say and not as I do! Go ahead and stain your boards and give them time to dry before assembling.
Step Three: Assemble Your Frame
You’re almost done! Pick up those boards and carry them into your bedroom. If you have the room, I recommend putting your frame together in your bedroom so when you’re finished you can slide it on without having to carry it anywhere.
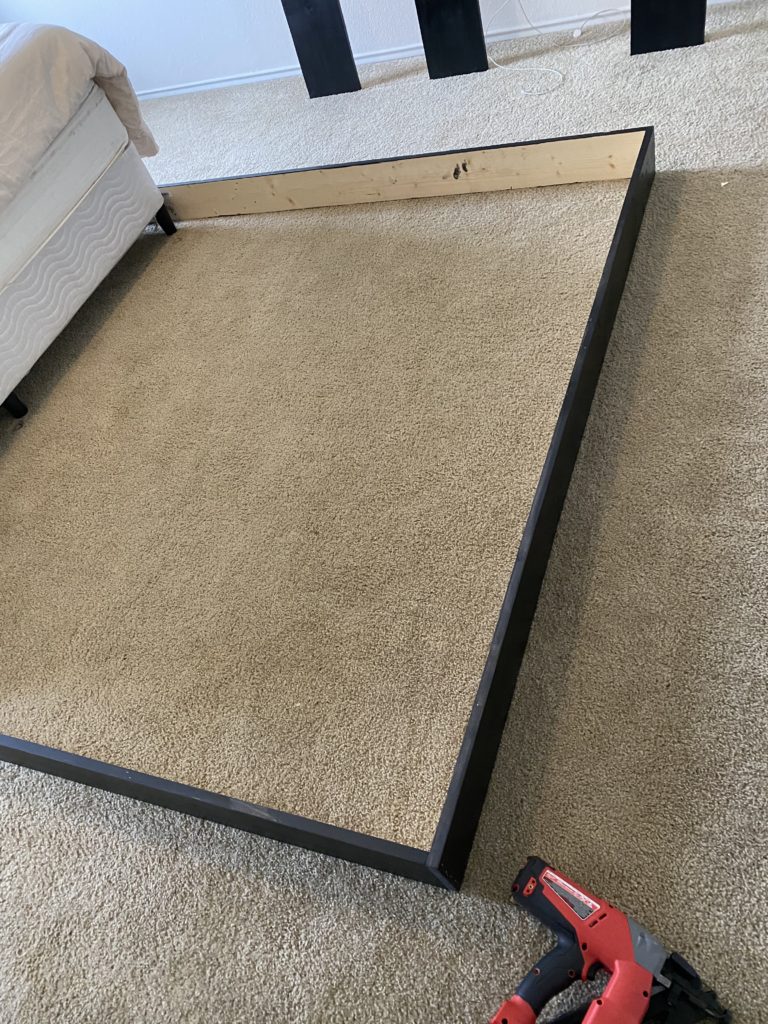
Take all of your 1×6 pieces and nail the side panels into the front panel. I used a corner clamp to hold everything in place while I nailed. For additional support, you can use a corner brace and wood screws.
When you’re done, your 1x6s should look something like this.
Next, take your 1×10 front panel and nail it onto the front 1×6 at your desired height with .75″ sticking out on each side. It should look like this.
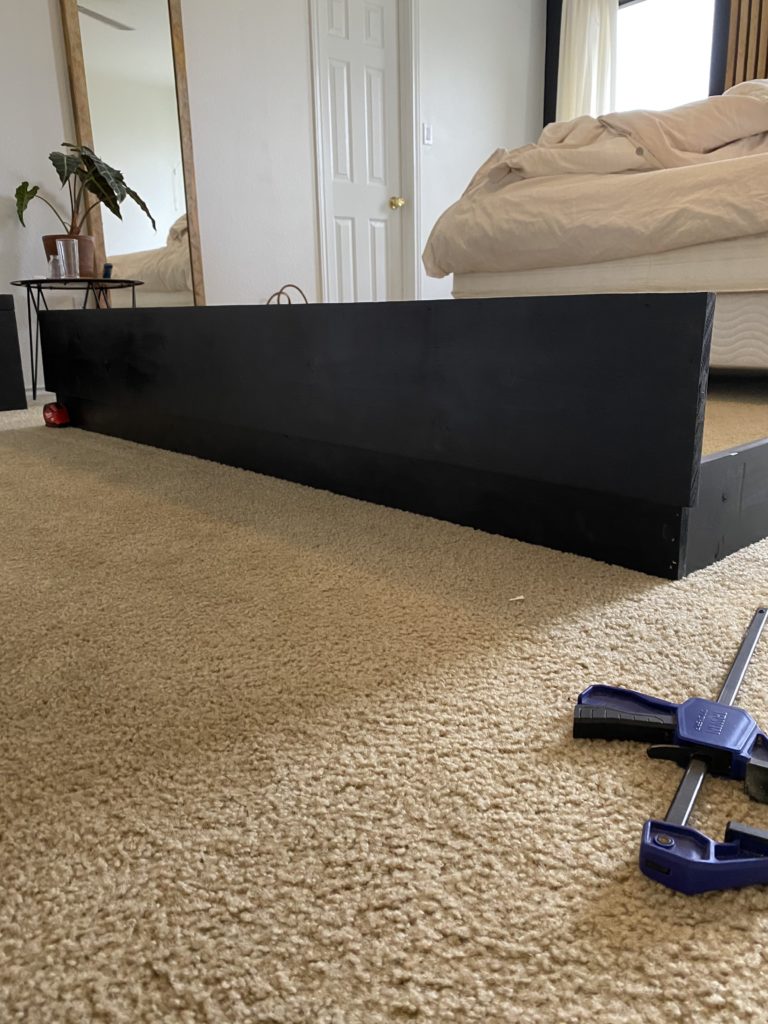
Finally, push your 1×10 side panels up to the front panel and nail into place. I placed a level on top to make sure everything was straight before I secured them together.
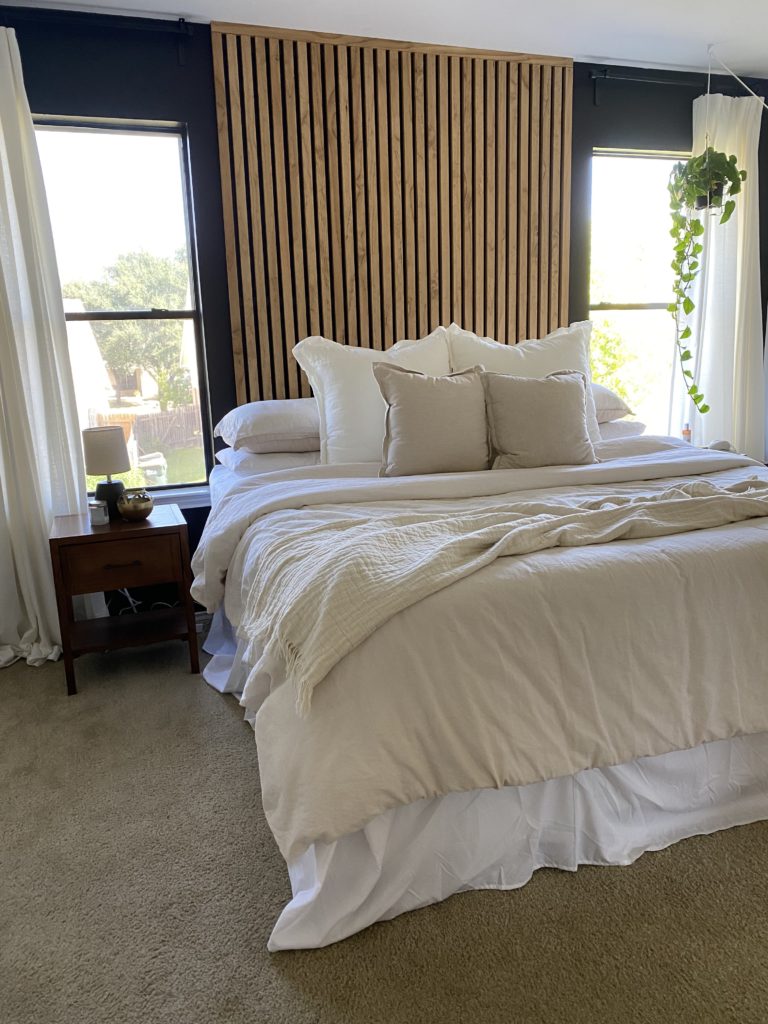
Once you’re finished nailing them all together, slide your completed frame into place! Your bedding should fit securely inside your frame, adding to the illusion that this is a solid bed frame!

When I had the initial idea to create a bed frame cover I searched high and low to see if anyone else had attempted this and I couldn’t find anything. So I hope this is helpful to those of you that have considered it!
If you attempt this DIY I would love to hear from you! Drop any questions you may have in the comments below and I’ll answer as best as I can.
If you’re interested in recreating my Vertical Slat Headboard, you can find those details here!
Disclaimer: this post may contain affiliate links, meaning I get a commission if you decide to make a purchase through my links, at no cost to you.

Your idea is simply brilliant. I’m inspired but want the frame to look like an upholstered bed! Thanks for the post.
A friend showed me this post in 2020 and it took me too today to re find it! This is exactly what I’ve been looking for to elevate my bedroom and can’t wait to build. Great work!!
oh I’m so glad!! Best of luck on your project!
Bravo! That looks built in, Great Job. Im thinking about doing the same, Wish me luck!
[…] Tutorial: campbell-house.com […]
Just found your project, and you are brilliant! Did you fasten the side panels at the headboard area to the frame rails?
Thanks so much! Ya know, I didn’t do that but I think that would be a great idea!
Brilliant idea! thanks so much for the instructions. This will be a winter project for sure. Have been wanting to get rib of the awful bedskirt for a long time.
Any chance you’ve heard from someone who added fabric? I love this idea of building a frame and keeping the sturdy metal frame. It’s beautiful! Thank you for sharing!
I personally haven’t, but I bet with some thinner batting underneath, you could pull it off no problem!
So very clever! It looks awesome! I would replicate that room if I had the skill and a body that isn’t creaky. The best part? That you invite your adorable fury baby to share your bed.
Maybe you should consider a side hustle🤗
Hi
Do you think this would also work with adjustable bed?
Nancy
HI,
Thank you so much for sharing your idea. I plan to try it out and put fabric on the top panel and keep the bottom panel wood. When you refer to the measurements of your bed frame, are you also including the box spring? I imagine when you said 13″ for your frame, that is from the box spring to the floor? I have a low metal frame on wheels and a low profile box spring that sits on it that is 11″ from the top of the box spring to the floor. I just want to make sure I am following your measurements. Thank you!
Amy
What a wonderful and simple idea. We just received a new bed with adjustable frame, which is unattractive, to say the least. This is a perfect, low cost solution. And beautiful, to boot! Thanks!