How to Renovate a House While Living in It & Our Living Room Design Plans
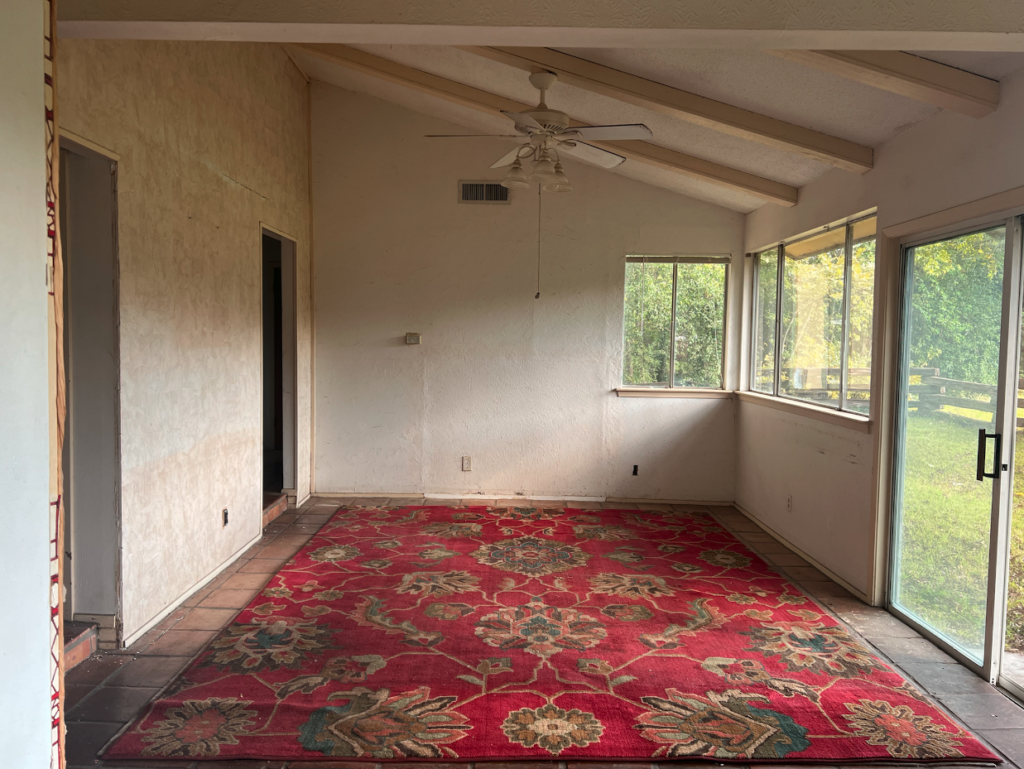
In case you missed it, we bought a house! It’s a 1970’s Spanish ranch house that needs a LOT of love. After some experience with DIY renovations, we’ve discovered how to renovate a house while living in it without losing our minds. (Spoiler alert: 10,000 lists). First, we address our immediate needs. We need a decent place to sleep, a functional kitchen, a usable bathroom and working HVAC. As long as we have those items, we can move in and get started on the transformation.
When it comes to living in a renovation, we highly recommend focusing your efforts on one room at a time. Make a list of everything that needs done in one space, then check items off one-by-one until that room is complete. This way you’re avoiding little projects and messes throughout your home and a to-do list that feels endless. Our living room is at the center of our house, so that’s where we’re starting.

Step One: Identify Your Must-Haves
Consider this your room “outline.” I happen to love a good list, so that’s where I start. Make a list of all your must-haves for the room your renovating. In this case, we’re focusing on the living room, so ours looks a little like this:
- cozy couch
- enough seating for family & friends
- cozy lighting
- coffee table
- side tables for drinks
- storage for blankets
Step Two: Create Your Design Plans
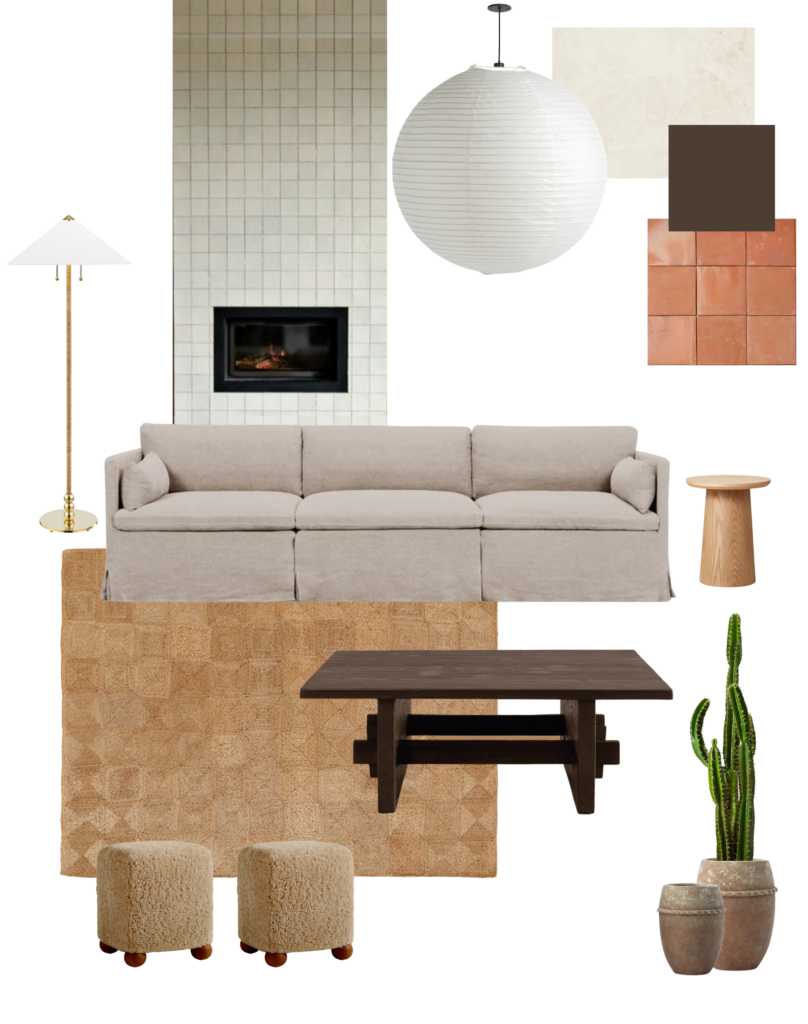
I LOVE this part. I’m not going to go into detail on how to design a room, because that’s a whole blog post in itself, but I will share our living room design plans along with a glowing endorsement for Pinterest. Don’t forget to incorporate all of your must-haves into the design plans.

AHHH! I’m SO excited to bring this design to life. This is the Spanish ranch living room of my dreams, and I have even more funkiness in store than what you see here.
Once you’ve sourced everything for your design, you can buy pieces as you go, DIY or source secondhand. All links in my design will be included at the end of this post.
Step Three: A Clean Slate
In order to bring your space together, you need a good foundation to build upon. For this step, we’re addressing all of our surfaces–floors, ceiling and walls. This is where you start to really dig into the renovation. List time! Make a list of everything you need to do to these surfaces to prep them for your designs, and then get to work. Here’s our running list:
- Skim coat the walls
- Prime and lime wash walls and ceilings
- Paint ceiling beams
- Refinish tile floors
- Replace baseboards and door trim
- Replace light fixture
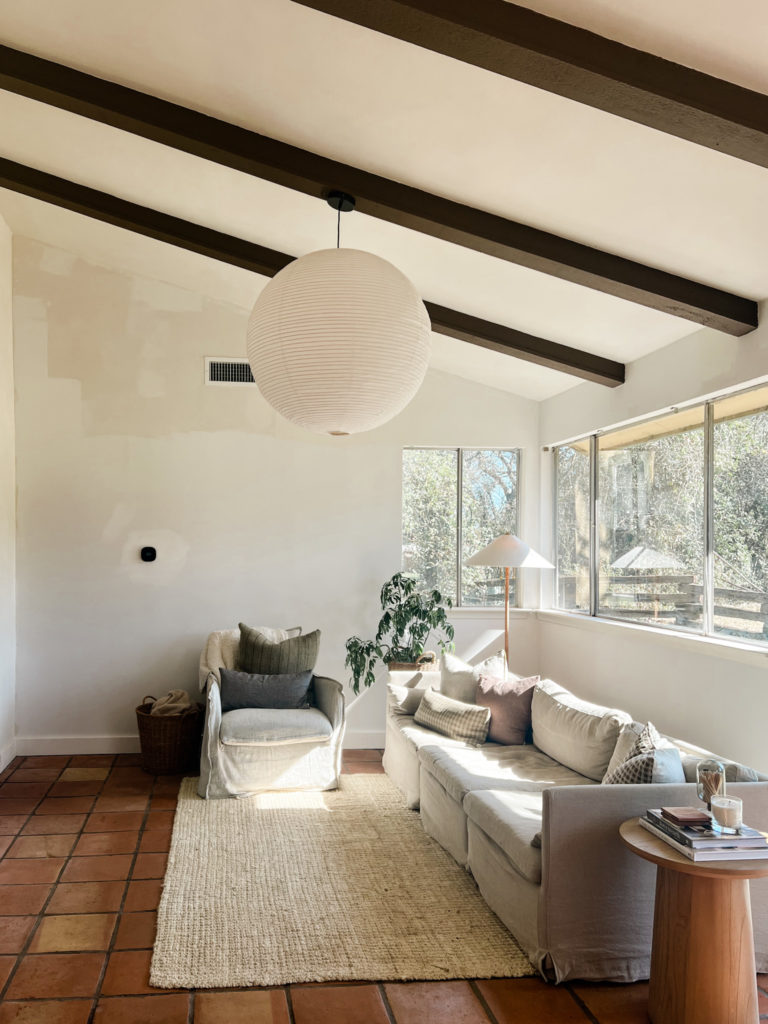
We are currently in the thick of this step. We’ve lime washed one of the walls and the ceiling, painted the beams, replaced the baseboards and refinished the floors. It’s truly been a labor of love but every project gets us one step closer to a finished space.

Step Four: Add-Ons
Now that you have a clean slate, you’re ready for any additional builds. In our case, that would be the fireplace. Unfortunately we can’t build the fireplace until we renovate our bathroom (for logistics reasons), so this project is going to be pushed to phase two.
Step Five: Installation
The final step is where all of your hard work comes together! The renovations are complete and all that’s left is putting the room together how you envisioned it. Roll out your rugs, hang your drapes and style your shelves because it’s time to furnish and decorate. Once this is complete, your work here is done. Time to move on to the next room!
I really wish we had a finished living room picture to throw in here, but there’s a whole lot left on our to-do list. I hope this step-by-step guide helps you through your renovation. Drop any questions you have in the comments below.
LINKS:
Coffee Table (Similar – I plan to build this)
Jute Rug (similar, budget-friendly)
Disclaimer: this post may contain affiliate links, meaning I get a commission if you decide to make a purchase through my links, at no cost to you.
Add a comment
0 Comments