DIY Minimal, Horizontal Wood Slat Headboard + Floating Nightstands
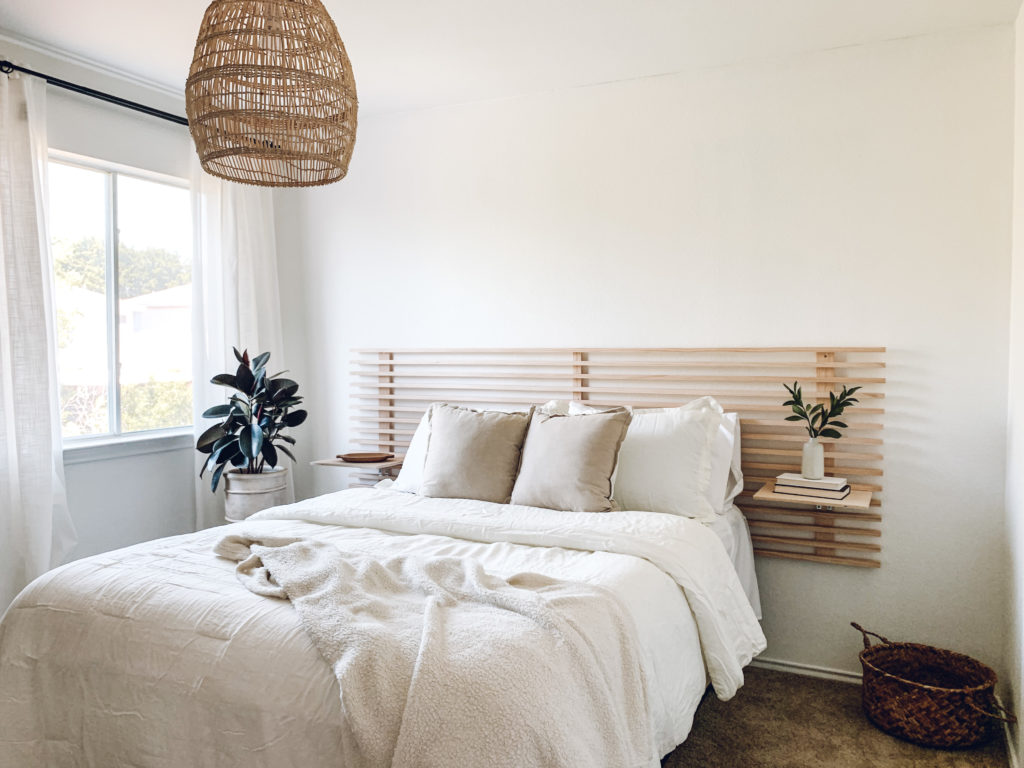
This weekend we decided to tackle another project for the guest bedroom to add character and functionality. I’ve spotted a few versions of headboards similar to this on Pinterest and fell in love! With a little bit of work, lumber and some nails, we created our own version of this DIY minimal, horizontal wood slat headboard with floating nightstands. Here’s how we did it–
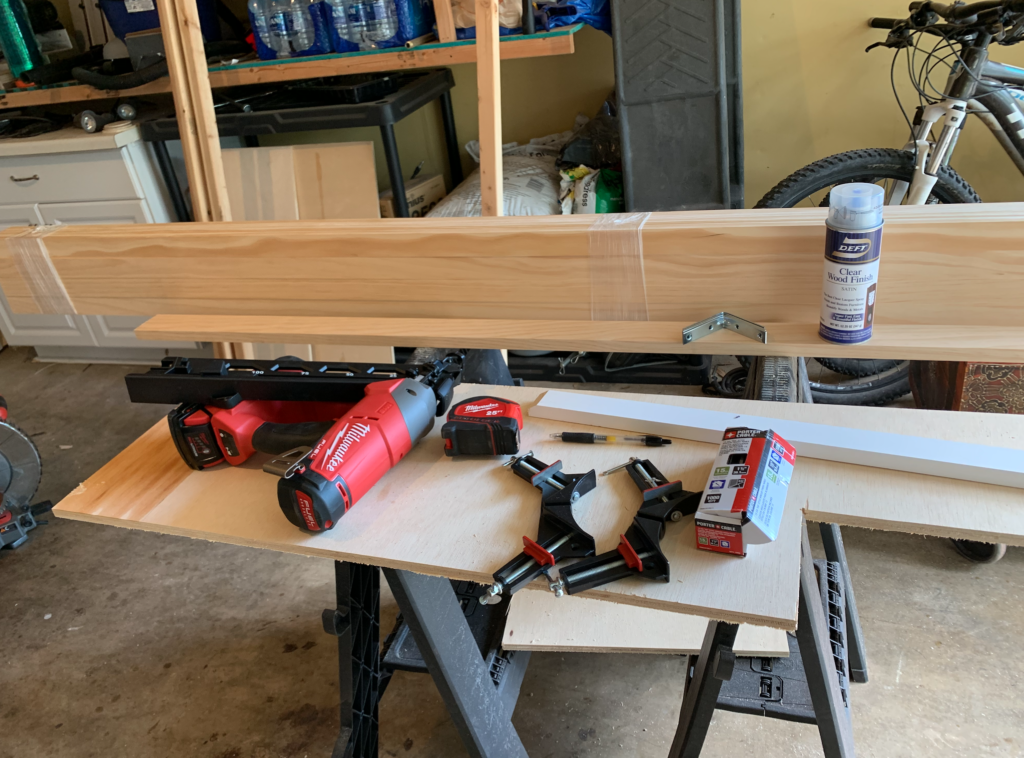
Materials:
- (15) 1x2x8 pine boards
- (2) 1x3x6
- leftover plywood
- corner braces
- 15 ga. nails
Tools:
- nail gun
- saw
- tape measure
- stud finder
For our build we used a 15 ga. nail gun (though the project could be completed without one using a regular hammer and nails or small screws). A saw is needed to cut the vertical pieces, but you can have this done for you at your hardware store.
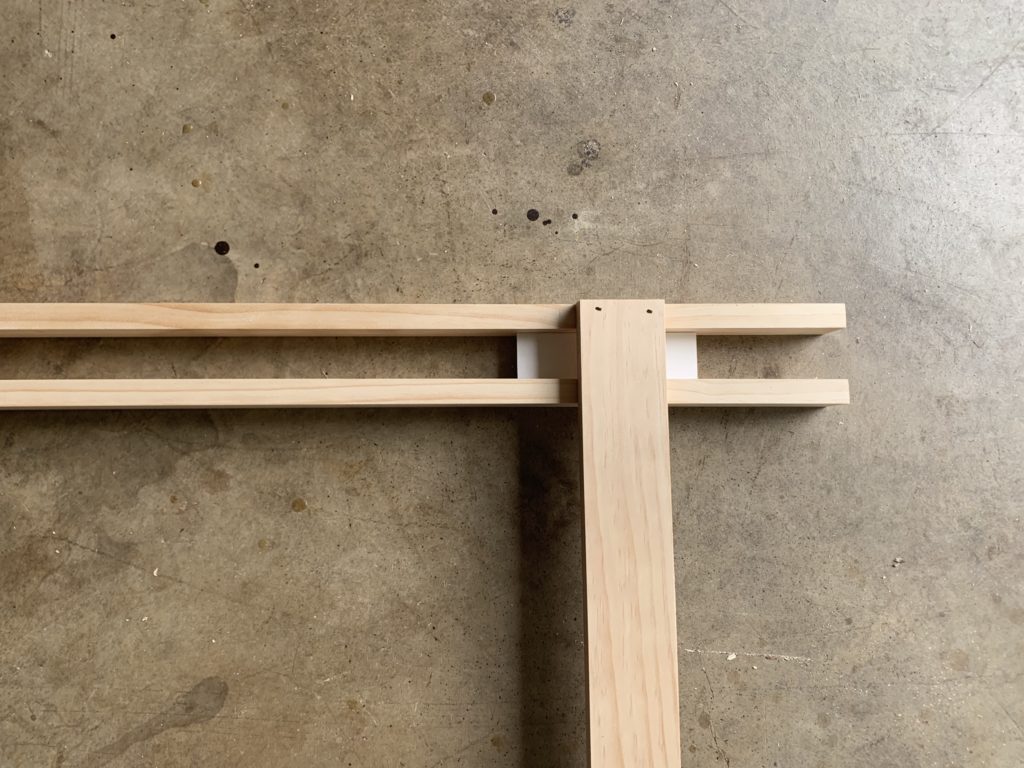
We started with planning out our measurements (thank god for Taylor’s math skills because I would have it all kinds of wrong). We left the 1x2s 8 ft long. The only cuts we had to make for this project were the vertical support pieces and the plywood shelves. To calculate the height of the vertical pieces, we added the sum of the thickness of the boards (the height of the boards x 15) and the spaces between boards (the height of the spaces x 14).
So, since we chose to install the 1x2s sideways, this meant our vertical supports should be 32 1/4 inches long.
Once the vertical supports were cut, we located them so that they would line up with the studs behind the bed. We then arranged the first horizontal piece so that it would be centered on the bed before nailing it flush to the top of the vertical supports. We quickly installed the remaining pieces by using a piece of 1×2 as a spacer to separate and align the boards as we nailed them in place.
We continued this process with the first ten boards. We skipped nailing the 11th board in place so that we could install the shelves later, before nailing the board in place over the brackets.
With the rest of the boards in place, we stood the headboard up so that we could install the corner braces and shelves. With the shelves in place, we were able to install the last board and complete the assembly. Using a level and a tape measure, we placed the headboard in the desired location and secured it to the studs with 3 1/2 screws.
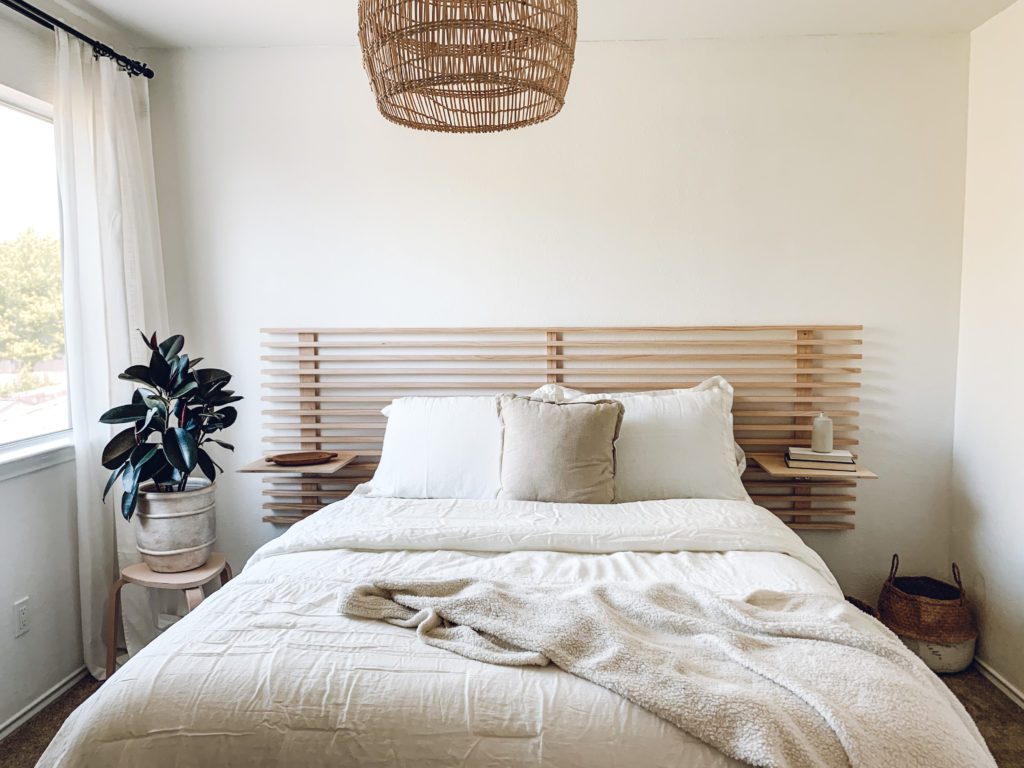

I love the character and custom feel this DIY wood slat headboard added to our guest bedroom! It came together so well and I love that it’s something we created together. If you’re looking for a fun weekend build– this is a great project to tackle with limited tools or skills required.
Next up, we plan on continuing our DIY vertical slat wall throughout the entry way. You can check out that project and some fun before and afters here.
As always, thank you for following along with our crazy ideas and never-ending need for a project! Welcome to Campbell House, we’re so glad to have you!
Disclaimer: this post may contain affiliate links, meaning I get a commission if you decide to make a purchase through my links, at no cost to you.


How did you mount this to the wall? Thanks!
Hey Heather! Super simple! We just screwed through the headboard vertical supports into wall studs. If you don’t have studs where your supports are, I would recommend four wall anchors.
Where to the braces come into play?? I love this idea! Just not sure I’d know how to nail to the wall
We just screwed directly through the vertical pieces into studs in the wall! If you don’t have studs there, I recommend using four wall anchors! Simple as that!
[…] DIY Wood Slat Headboard with Floating Nightstands saves space and looks […]
This is so beautiful!! How do you attach the night stands?
Thank you, Anna! We just used two small corner brackets under each shelf that we attached to the vertical support pieces. They won’t hold a ton of weight but perfect for charging your phone and a small lamp!
Hi! What would the measurements be for doing a king size?
So we just used standard 8ft. 1x2s for this queen sized bed, so it depends on how wide you want it off of the bed! I think 10 ft would probably work well!
Love this!!! Was looking to waste $300 for a new headboard before coming across yours!! Thank you very much! 🙂
Hi! What was the cost of this diy project?
The total cost was around $100 for the lumber, but you could use cheaper wood and save even more money! I hope that’s helpful! 🙂
How did you install the shelves?
We used small corner brackets attached to the vertical pieces! Super simple, but it won’t hold a ton of weight. It’s great for a small lamp and candle 🙂
I’m showing this to my Husband as we need to just was looking at new bed for spare room. i love this look. kinda Scandinavian. which i love. perfect for my small spare bedroom. thanks again for sharing your diy.. Stunning
Thank you so much! It was really easy to put together!
Hi, I’m going to try to replicate this, this weekend. What was the spacing you did between the boards? You said you used the 1×2 but I’m having trouble getting the numbers to add up to 32.25.
Hey Barbara! So happy to hear you’re giving it a try! We used a scrap piece of 1×2 but used the small side as the spacer (turned it sideways). Also, feel free to mix it up and use whichever size gaps you like best, it is totally customizable! Just be sure to cut your vertical supports to the right length and you’re good to go. I would love to see how it turns out–good luck!
Hi! I’m starting to work on this DIY project.. and I’m wondering.. did you flip the center vertical support board on its skinny side? It looks that way in the photos.. but couldn’t find if you mentioned it or not in the write up.. also.. I was confused about the 32.25” measurement too.. because in the photos.. it actually looks like the spaces between the horizontal boards is 2”…. Not 1”
thank you so much for sharing this DIY.
So exciting you’re working on this project! To answer your questions, we actually used 1x3s on the side vertical supports and a 1×2 in the center. We really didn’t do this for any particular reason, it was just the wood we were working with. For the spaces between the boards, we just used a scrap piece of 1×2 as the spacer, so it’s as wide as the 1x2s are which is around 1 1/2.” I hope that helps!
We are going to do this!
yay! I’m so glad! Keep me updated 🙂
what did you use to finish? It looks like there is a clear spray in your picture?
Hey Kayla! Great observation! I actually bought that spray to use for the headboard and ended up not using it. We just left the wood raw and haven’t had any problems with it
Hi Riley,
I am wondering what size your shelves and brackets are – thanks.
~Amanda
I was wondering what kind of bed frame you guys have! We want to do this, but I’m currently shopping for a bed frame… we have a tempurpedic mattress, so it sits on top of a box spring.
Hey Nikki! We just had a standard metal bed frame. Since the headboard is attached to the wall, you can use any frame and accommodate the height. Thanks for reading, it means so much!
IKEA used to sell exactly the same headboard design. I always wanted one but it was discontinued.
I found that in my research! This was probably cheaper actually and was custom for the space!
[…] get a little creative and put some work into it, you can DIY that headboard for cheap! Check out this DIY or this one for […]
I would have loved to see a before and after photo, but I’m sure the headboard really transformed the space! I’m hoping to do a similar project once our hardwood floors get resurfaced to tie the bedroom all together.
[…] DIY Minimal, Horizontal Wood Slat Headboard + Floating Nightstands by Campbell House: https://campbell-house.com/2020/05/18/diy-minimal-horizontal-wood-slat-headboard-floating-nightstand… […]
I’m curious, what is the size of the plywood that you used to create the shelves?