DIY Kitchen Tile Backsplash
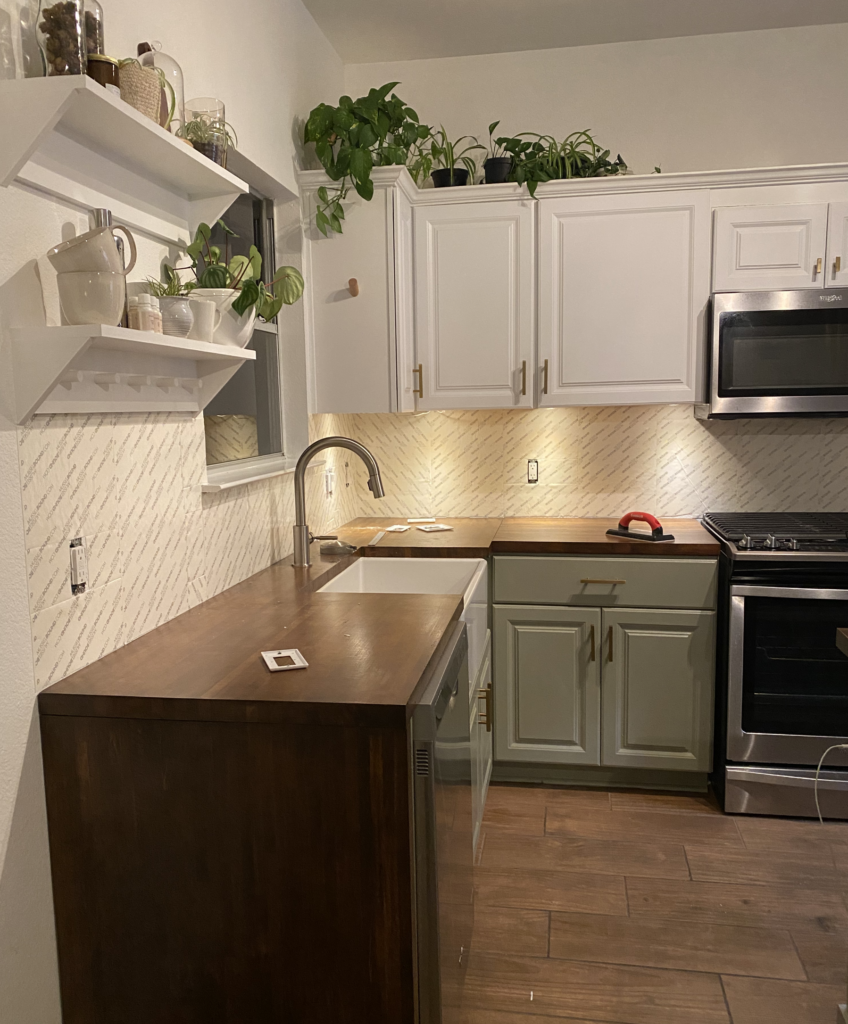
Last weekend, I did something kind of crazy on a whim. Long story short, it was 2pm on a Saturday and I didn’t have anything else to do so I went to Floor & Decor. I collected all the materials I needed to install a DIY kitchen backsplash and headed to the check-out counter! If you’re interested in seeing the kitchen renovation we started in March of 2020, here’s an update!
I had a hard time finding good, easy-to-follow tutorials for this so I’ll be sharing all the nitty gritty details with you. (Full disclosure: I am NOT a professional. I am sharing my personal experience and process from a DIY perspective.)
Luckily, Floor & Decor had everything I needed in-stock. My tile and installation materials came out to a total of $276.12.
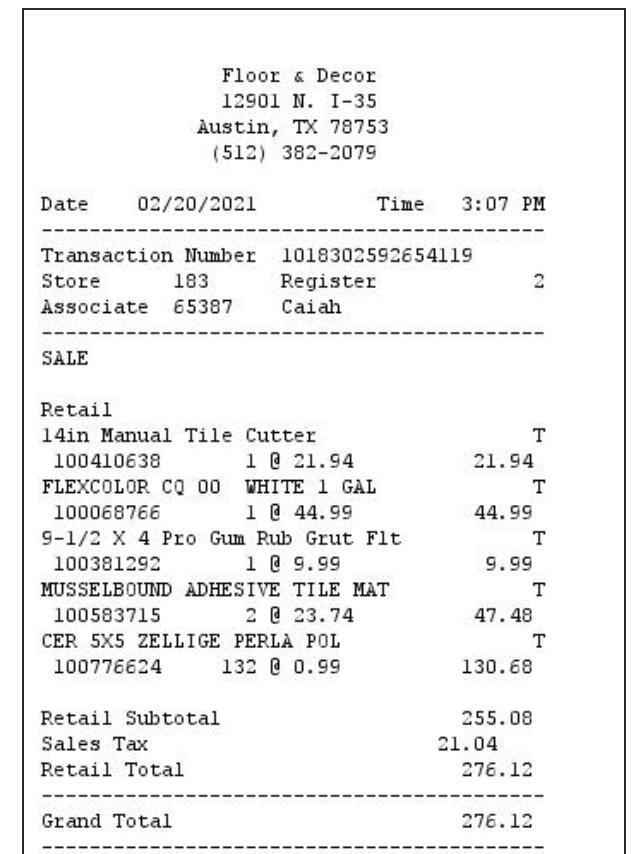
The Materials:
- Tile Cutter
- White, pre-mixed grout
- Grout Float
- Musselbound Adhesive (2)
- Ceramic 5×5 square tile (3 boxes)
- Caulk
- Large Sponge (pre-mixed grout comes with one)
- (Optional, but recommended) Laser Level
- (Optional) Tile Spacers
Step One: Apply the Musselbound
If you’re not familiar with Musselbound, it’s essentially a double-sided tape system made for tile! It takes the place of a mortar for smaller tiling jobs like backsplashes and shower walls. It’s a little more expensive than mortar but 100% worth it! (Note: Before using this product, do your research and verify it is recommended for your intended use. You can find more details here.)
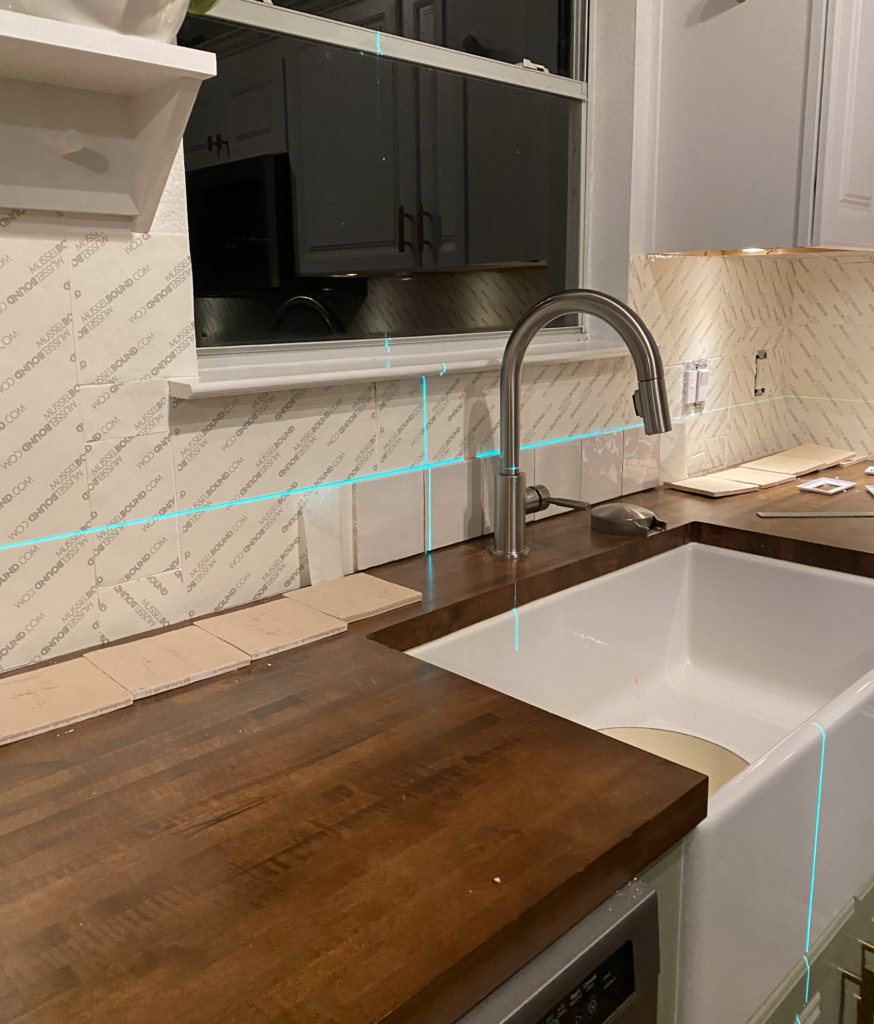
To install the musselbound, make sure your surface is level, clean and dry. I set up my laser level so I could see exactly where I needed to stick my mat, then rolled it out from the top of the laser line to the countertop. I used a straight edge ruler to press into the bottom of the mat and cut the piece with a utility knife. Here’s how I installed it around an outlet:
This is how the space looked with all the Musselbound in place –
Step Two: Prep Your Tile
With Musselbound in place, it’s time to prep your first row of tile! Once again, I set up my laser level to see where the top of my tiles should line up. (I left a very small gap between the bottom of the tile and the countertop – you will caulk this gap rather than grout.)
Then, I found the center of the wall and lined up the first row of tiles working my way out to the sides. Do NOT stick them to the Musselbound yet. This step ensures there wont be a small sliver of tile in a corner. If this is the case, you can shift the row down so you have larger cuts on both ends.
Step Three: Start Installing Your Tile
This is it! You can start attaching your tile to your adhesive! Starting with the bottom row you prepped, use a knife to score the top layer of your Musselbound so you can easily peel it back tile-by-tile as you go. Line your tile up to the laser level line and press and hold the tile in place for five seconds. The adhesive is VERY strong and you wont be able to remove a tile once it’s in place. Be sure it’s exactly where you want it before you press it down. Continue this process until you get to your corners and are ready to make your first cut.
For this particular tile, I chose not to use spacers since it has a raw edge that creates a natural space. However, most tiles require you to use spacers for even grout lines. If you are using a different tile, be sure to purchase and use spacers between every tile.
Step Four: Make Your Cuts
Cutting tile can be very intimidating, but rather than using a wet saw, I purchased a very affordable 14 in. tile cutter that made the process a breeze! To cut your tile, simply mark where you want your cut, line it up to the center of the cutter, and score it by dragging the wheel across the top of your tile. Once your tile is properly scored, use the lever to press down firmly until the pressure breaks It. It should split exactly where you scored. It’s that easy!
Now that you know how to cut your tile, continue installing until all of your tile is adhered to the Musselbound.
Step Five: Grout
With traditional mortar installation, you need to wait 24 hours for your mortar to set before you can grout. With Musselbound, there is no wait time! So once you’ve adhered your tiles to the wall, you’re ready to follow-up with grout.
I used a pre-mixed white grout that made this process go very smoothly. Before grouting, be sure to properly prep your workspaces to keep your countertops protected. Once you’ve prepped your surface, put some grout on your trowel (I used small amounts, 1-2 Tbs size) and begin to smooth the grout into your gaps. After using this method across a section of your tile, let the grout sit for 10-12 minutes. Then, take a large, damp sponge (you don’t want it too wet) and use circular motions to remove the excess grout and grout haze. This took me 2-3 passes until the tiles looked nice and clean.
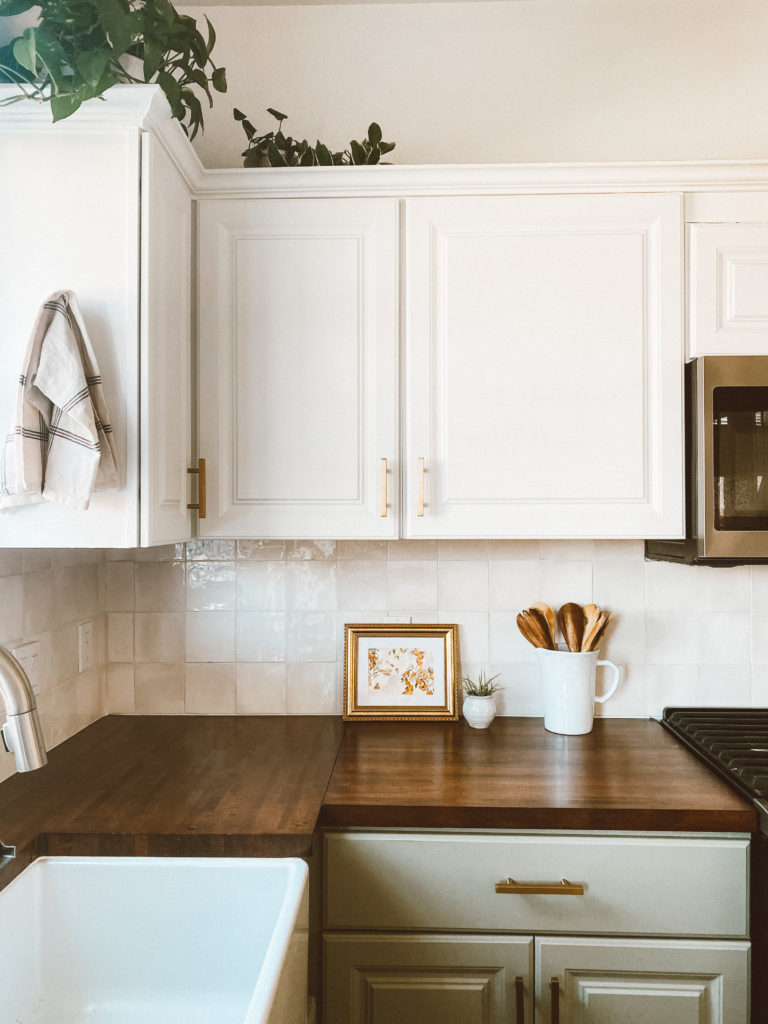
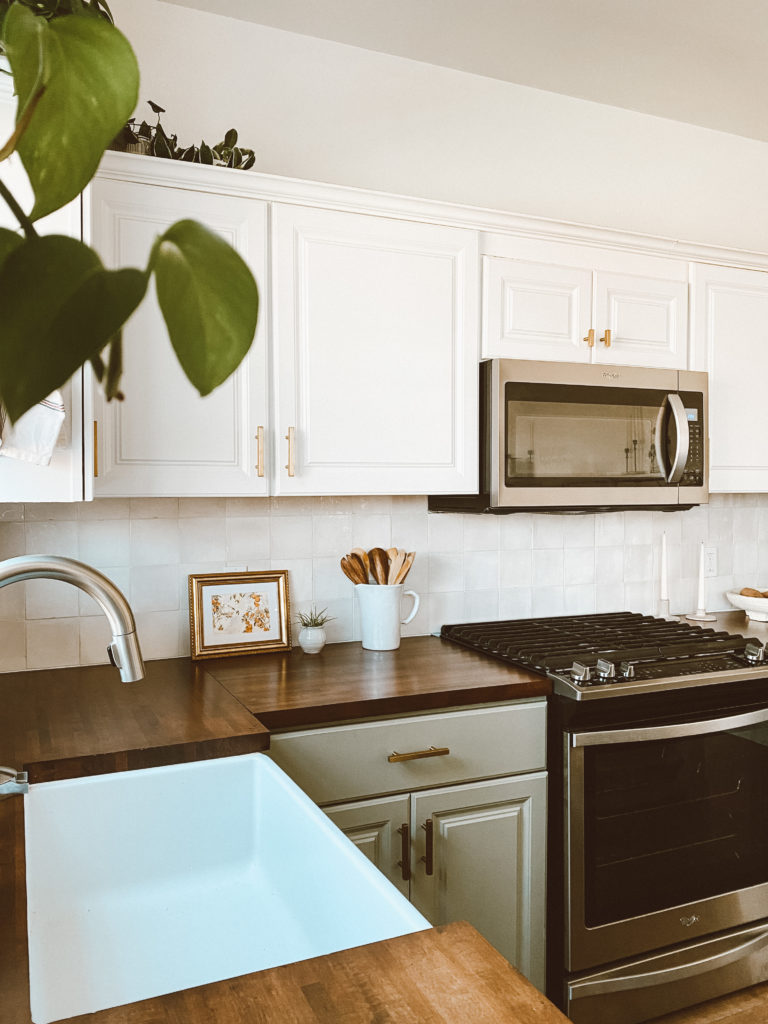
Step Six: Finishing Touches
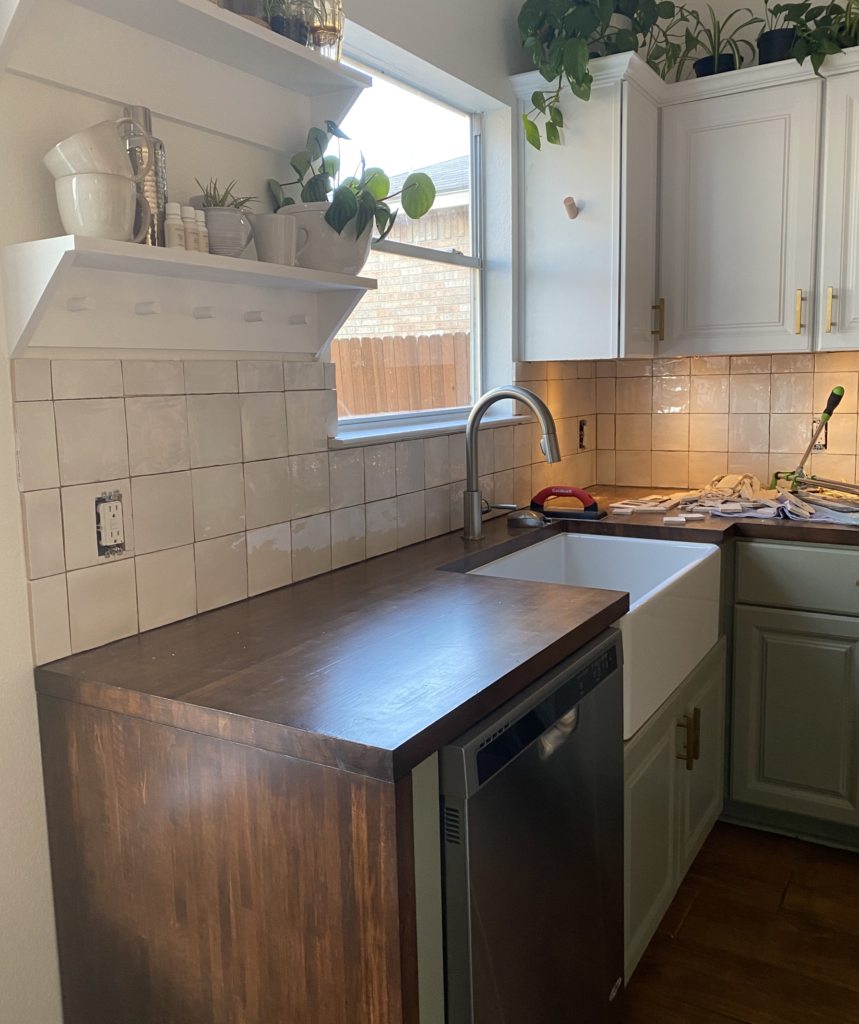
After letting your grout sit overnight, it’s time for the finishing touches! Apply caulk into the seams between your tile and other surfaces (i.e. countertops, walls, shelves etc). Clean of your countertops, screw your outlet plates back on and admire your hard work! YOU DID IT!!
Are you ready for the before and after?? Here’s my kitchen before…
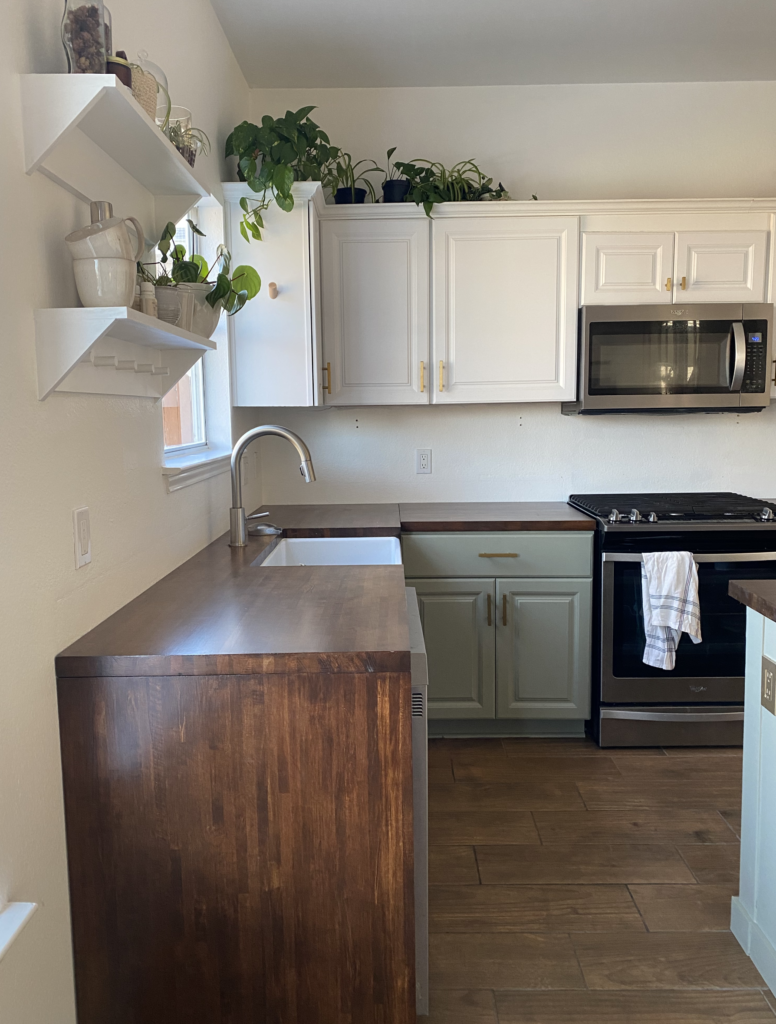
and AFTER!
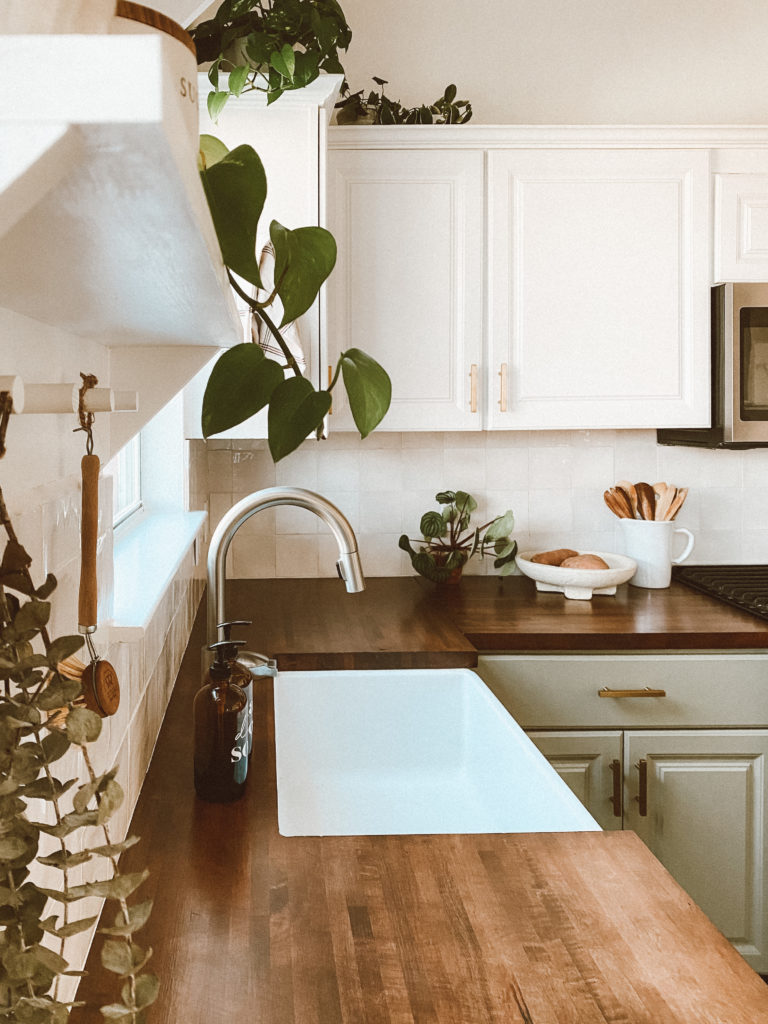
What do you think?? Would you take on this project? I have to say, it was a whole lot easier than I expected it to be. If I can do it, so can you!
Disclaimer: this post may contain affiliate links, meaning I get a commission if you decide to make a purchase through my links, at no cost to you.

It looks amazing!!
Thank you!!
[…] me! If you haven’t already seen the blog post with the tutorial and all the details, you can find it here. This project was on my to-do list for almost a full year, but I kept putting it off because it […]
Riley! The new backsplash looks great! Was following along via your Instagram stories and they provided some much needed motivation to start tackling a tile project I’ve been putting off. Thanks!
I’m so glad you found some inspo here!! Thank you so much for letting me know and for sticking around 🙂
Beautiful job! Did you have to do anything special to get the outlet covers back on? Did they still fit?
Thanks, Brittney! We bought outlet spacers and just had to put a few between the plates and the wall so the outlets still sit flush on the wall.
Looks great! Quick question! Did you use anything to finish the edge of the tile that was exposed on the side? We are doing this project in a couple weeks! So excited!
Looks great! Just picked up a sample of the same tile from Floor & Decor. My kitchen doesn’t have any natural light or under cabinet light. Once I got the tile home and set it up against the wall, I felt like it didn’t shine as much because of the low light. Did you encounter this at all? Are you happy with the tile itself?
I stumbled across this tutorial on Pinterest and have to say it’s SO helpful!!! I love the simple easy to follow way it’s written and the short videos after every step. Tackling my backsplash soon! I am thinking of using the same tile you used – but would love to cut it all in half to be 2.5×5, do you think the edges all cut would look ok? Thanks!
Oh I’m SO glad to hear that! This was one of the most rewarding projects I’ve ever done–you’ll love it! I wouldn’t actually recommend cutting all of these specific tiles in half since the edges are designed to be irregular, and cuts are fairly neat and strait and the grout lines would be inconsistent. However, if you find a tile with straight edges that plan should work just fine! Best of luck!
You didn’t use any edging for your ends. Do you regret not doing that or did that not work with the type of tile you bought?