DIY Kitchen Shelving Upgrade
When I tore down one of our kitchen cabinets on a whim, I chose an affordable shelving option as a placeholder until I decided what I really wanted. Well, over a year later and I’ve finally made up my mind. I was feeling like the kitchen (which we updated on a budget in early 2020), was looking a bit too cluttered. I decided to combat that with simple, white shelves with a bit of a “modern cottage” feel to them for my DIY kitchen shelving upgrade. I found this picture on Pinterest that sold me on the design.
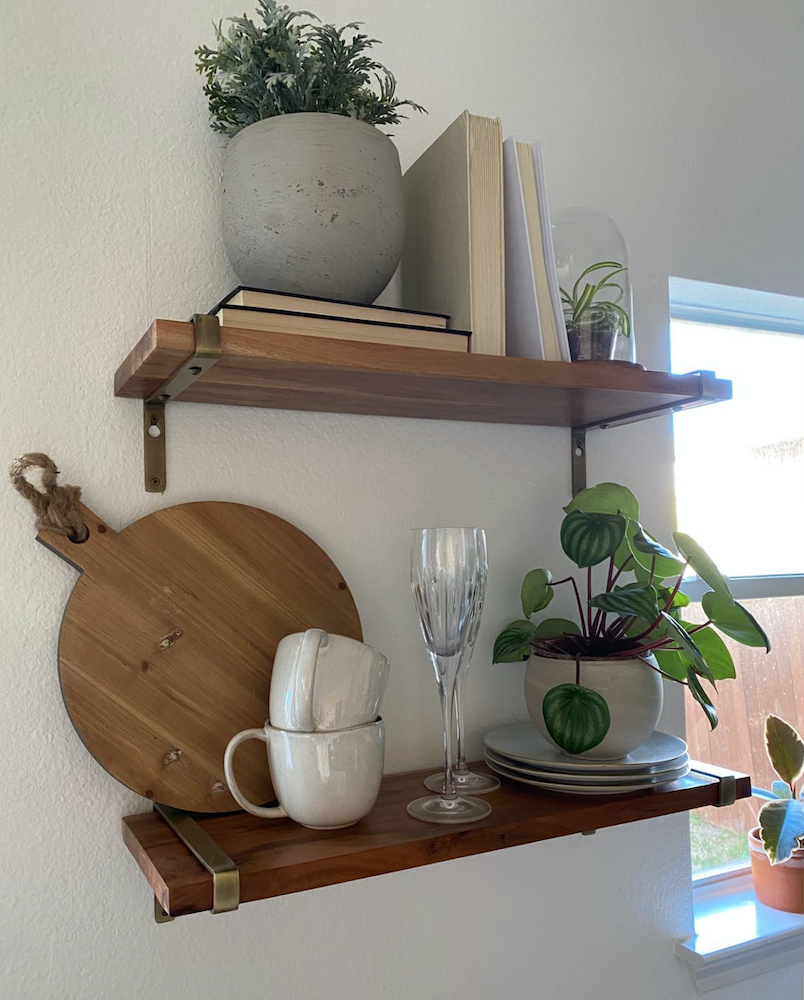
Here’s a look at the shelves I’ll be replacing:

Once I made up my mind, I got to work!
Materials:
- (2) 1x6x8 select pine boards
- 3/4″ wooden dowel
- paint
Step One: Measure Twice, Cut Once!
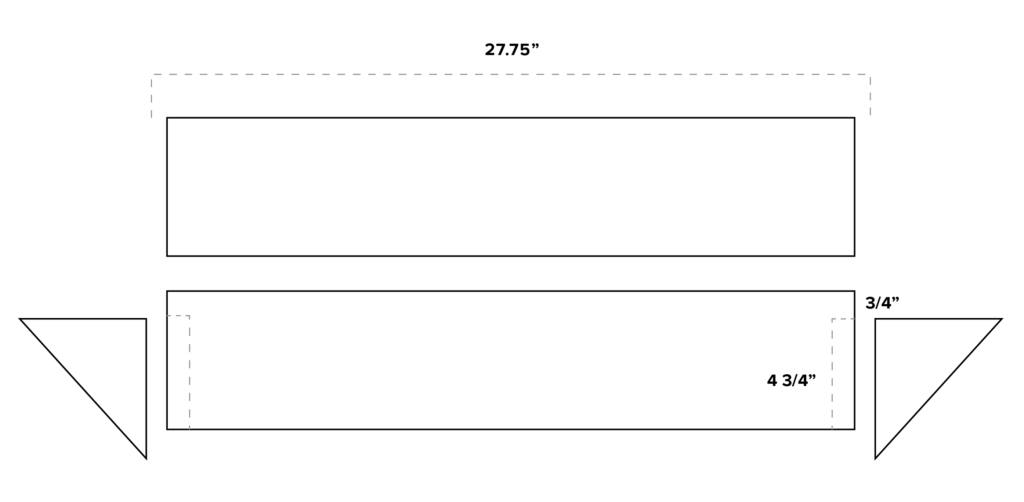
I measured out the length I wanted my shelves to be (27.75″) and cut four 1×6 pieces to length. Then, I turned the saw to 45 degrees and cut 4 triangles out of the remaining 1x6s.
I decided I wanted the shelf supports (triangles) to hang below the back of the shelves a bit. To achieve this look, we used a jigsaw to cut into the back pieces so the triangles could sit flush against the wall. Here’s a diagram that should help visualize:
Step Two: Install the Pegs
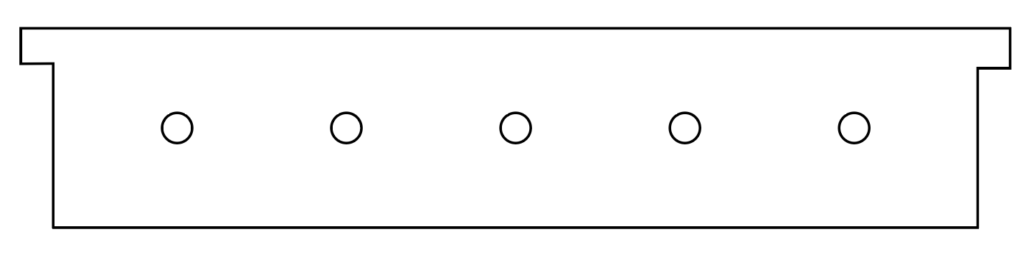
For the pegs, I took one of the back pieces (27.75″), measured 3″ from each side, and divided up that space (21.75″) for 5 pegs. Using a 3/4″ spade bit, I drilled the five holes. The pegs themselves I made from a 3/4″ wooden dowel that I cut into five equal lengths. To install, simply use wood glue or an adhesive to insert the pegs into the holes.
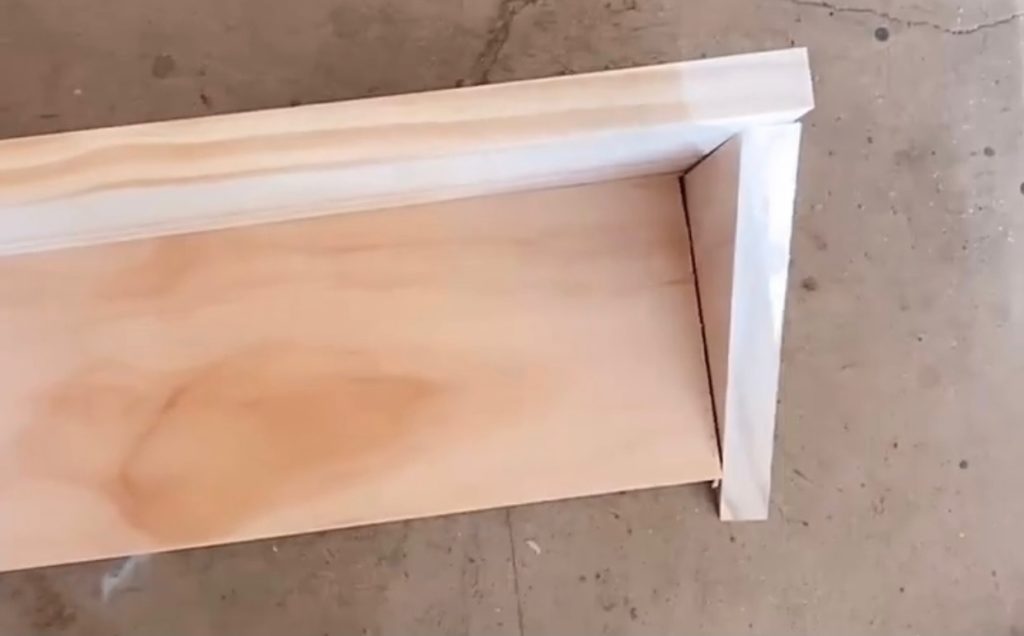
Step Three: Assembly
Once I installed the pegs, it was time to assemble the shelves! I clamped the back and top pieces and used our brad nailer to nail them together. Then, I did the same with the triangle supports and they were ready to be installed on the wall!
After I secured the shelves into the wall, I took some time to really give these a professional, built-in look by filling any screw/nail holes and caulking the seams between the shelves and the wall. Once this was all dry, I painted them the same white as the walls (“Polar Bear” by Behr) and styled them up!
Here’s a reminder of what the shelves looked like before:
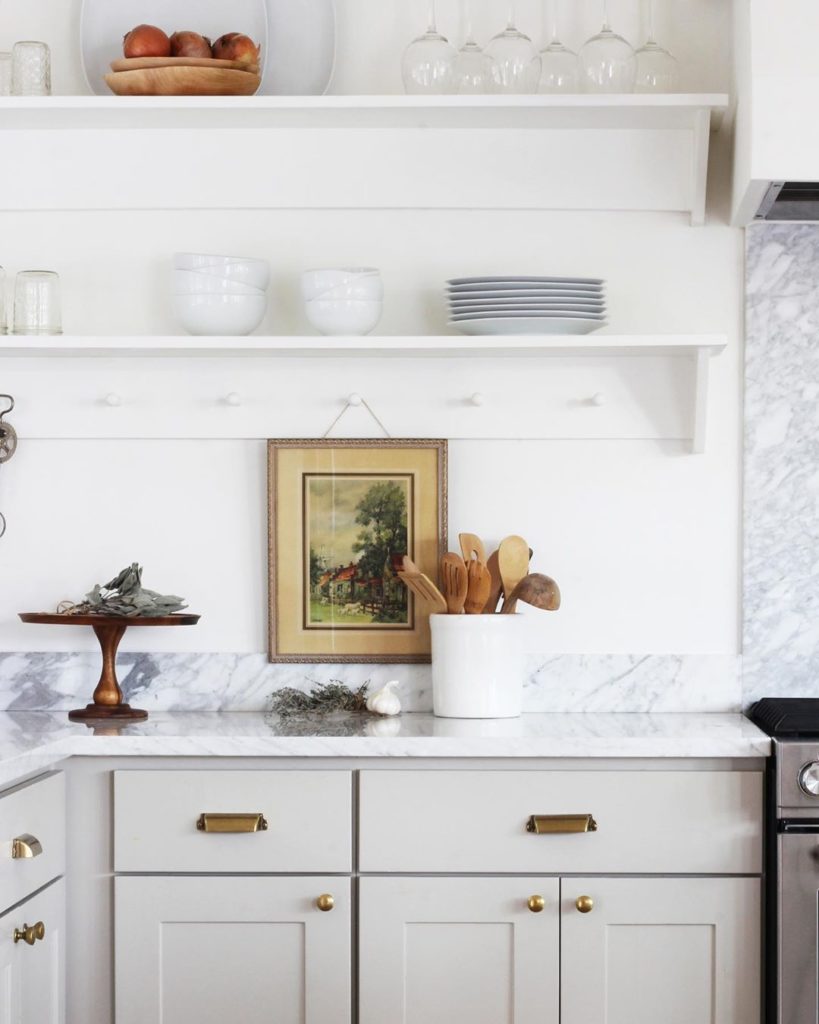
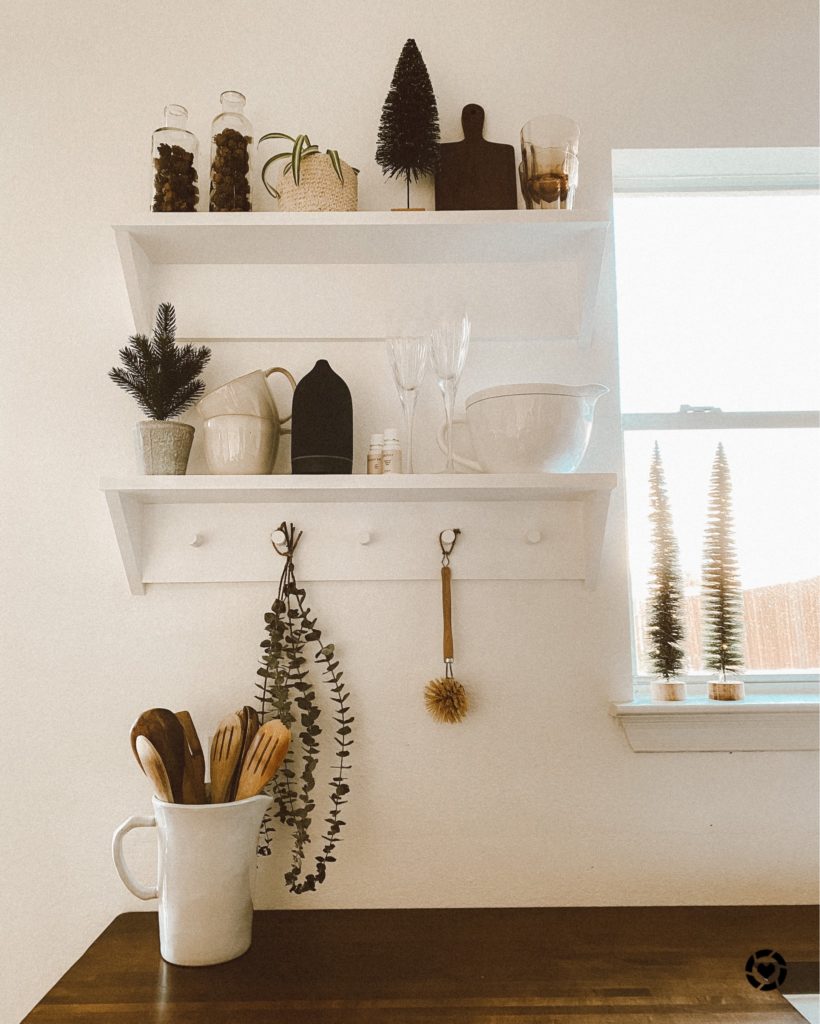
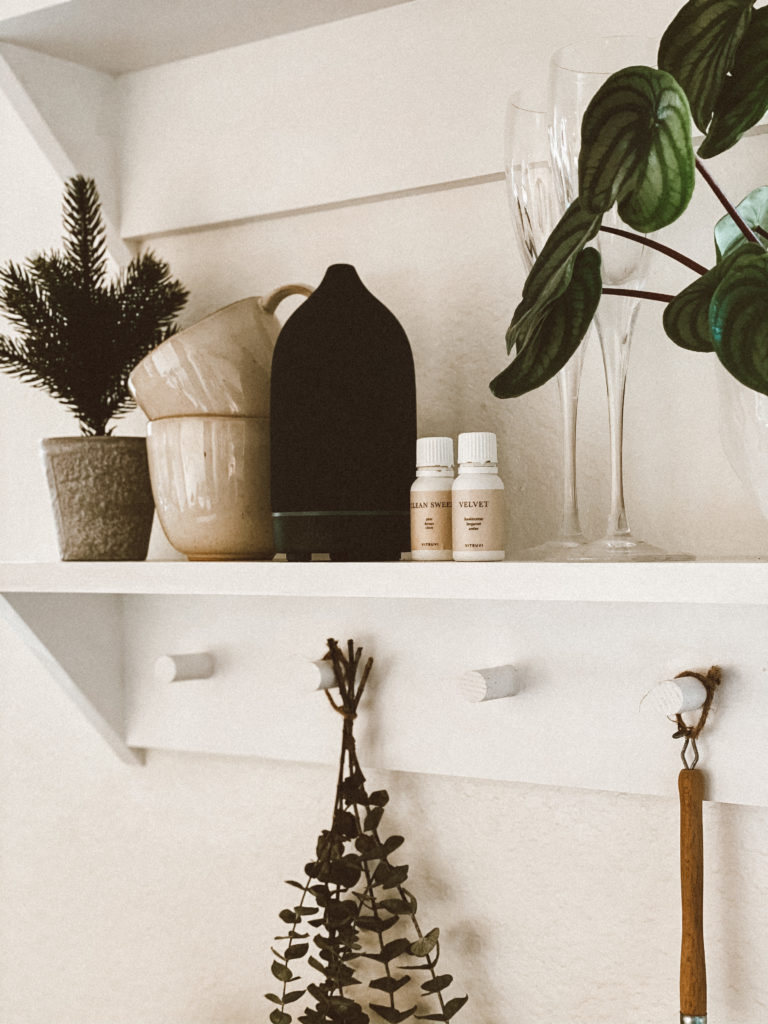
And here are the new shelves!

I am so pleased with the upgrade! Next up, we will FINALLY be adding a tile backsplash to finish up the kitchen renovation once and for all! If you’re interested in seeing all we’ve done to the kitchen thus far, check out my kitchen renovation post!
I’d love to know what you think of the shelves! As always, I’m happy to answer any questions you may have!
Disclaimer: this post may contain affiliate links, meaning I get a commission if you decide to make a purchase through my links, at no cost to you.

Hi, your kitchen looks beautiful! I was wondering what white paint color is on the upper cabinets and shelves?
The upper cabinets came pre-painted but we painted the shelves PPG “Pure White.”